Abbyy FineReaderAvidemuxAnt RenamerAdobe AcrobatAgent RansackAcronis Drive MonitorAcronis True ImageArdi4USB Imager ASUS ROG RAMDisk Draft for Information Only
ContentASUS ROG RAMDisk Setup
ASUS ROG RAMDisk SetupReference:
The main functions in using a ASUS ROG RAMDisk are.
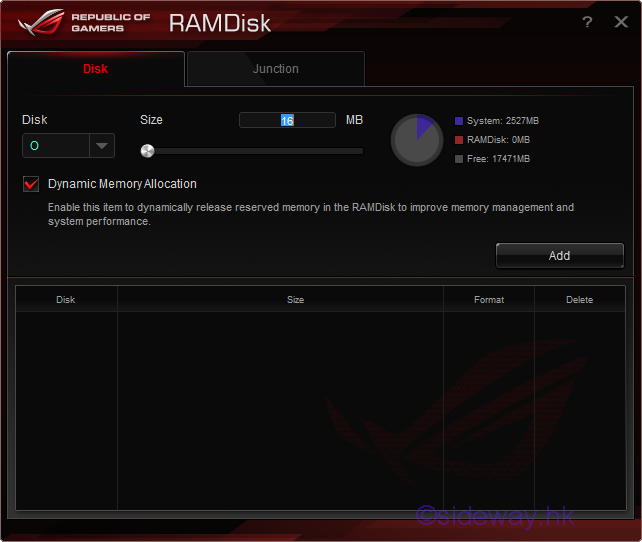
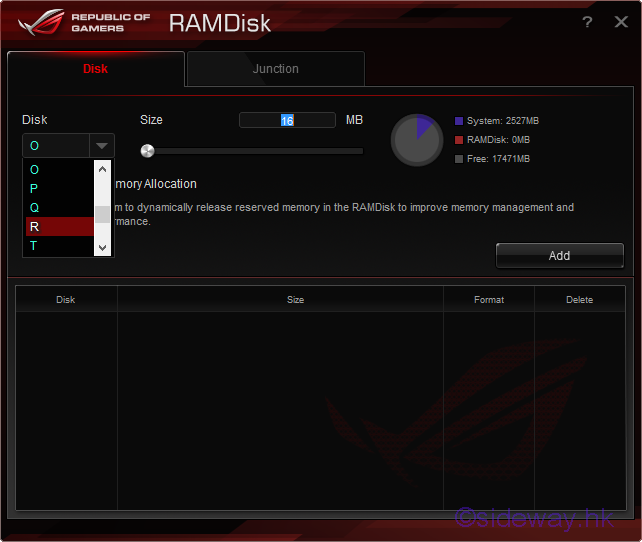
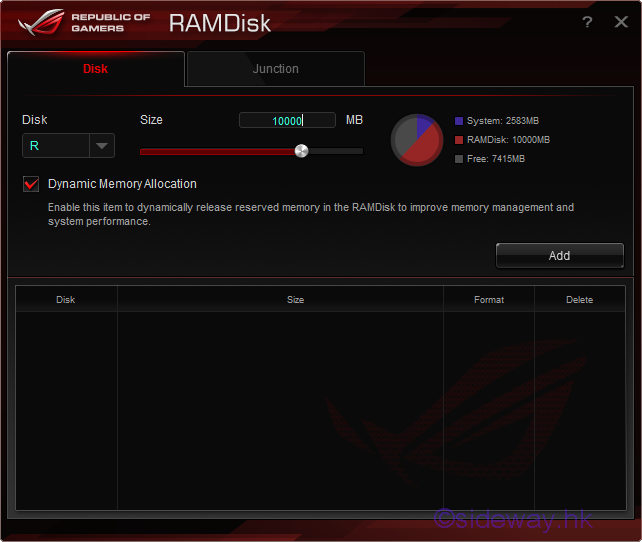
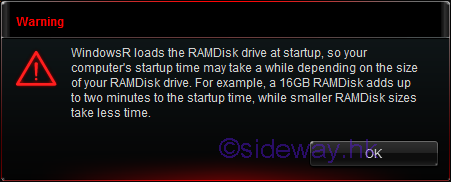
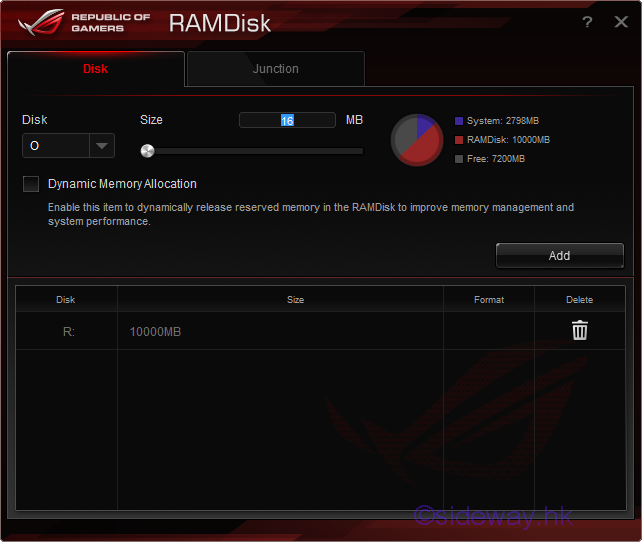
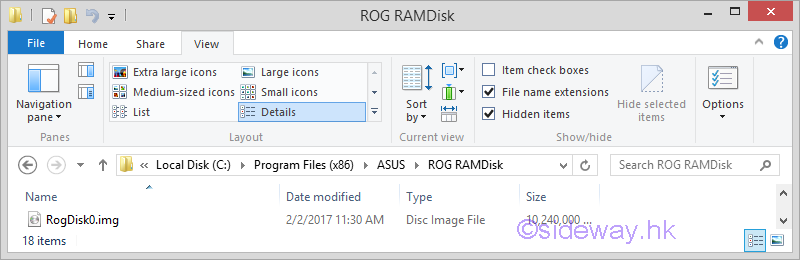
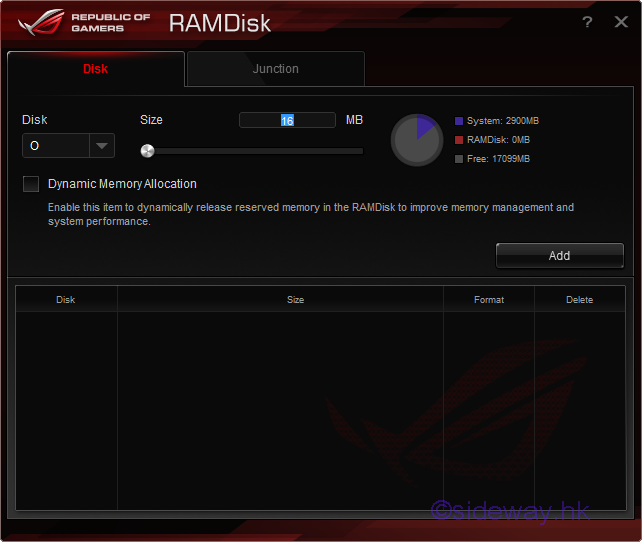
Create an Empty ASUS ROG RAMDiskSteps to create an empty ASUS ROG RAMDisk . 
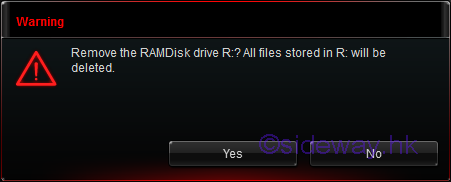
Delete an ASUS ROG RAMDiskkSteps to delete an ASUS ROG RAMDisk .
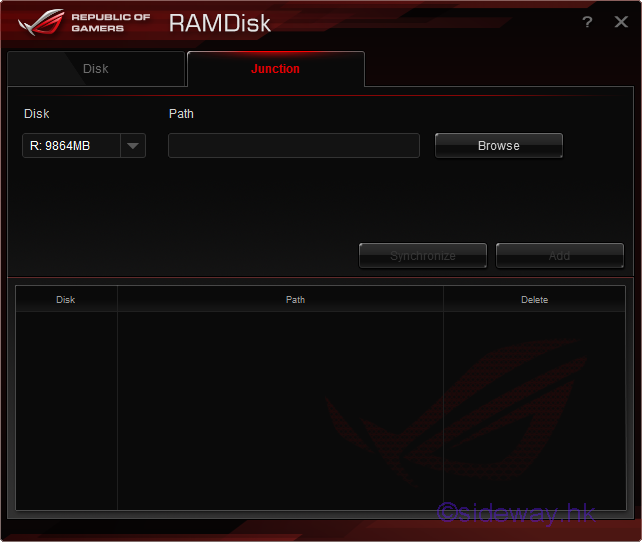
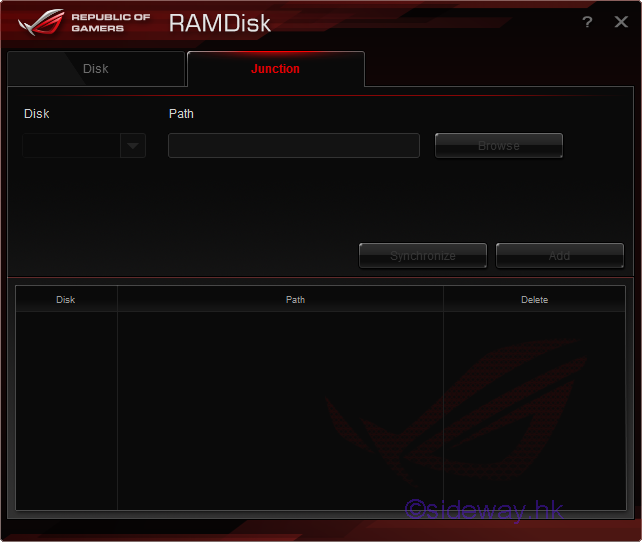
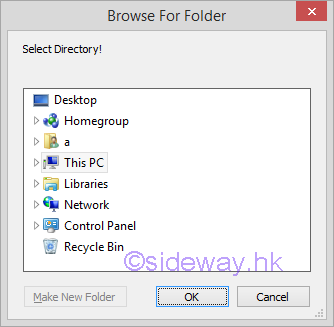
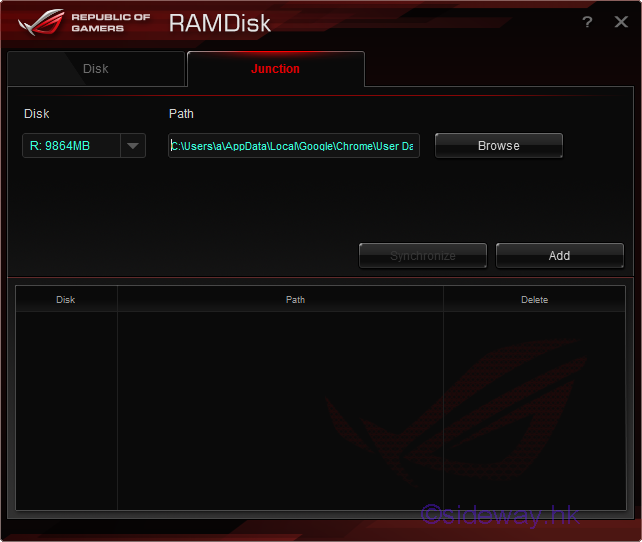
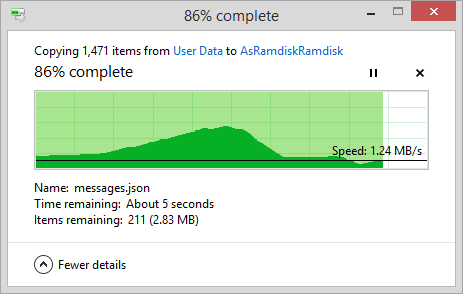
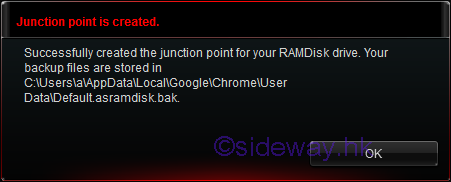
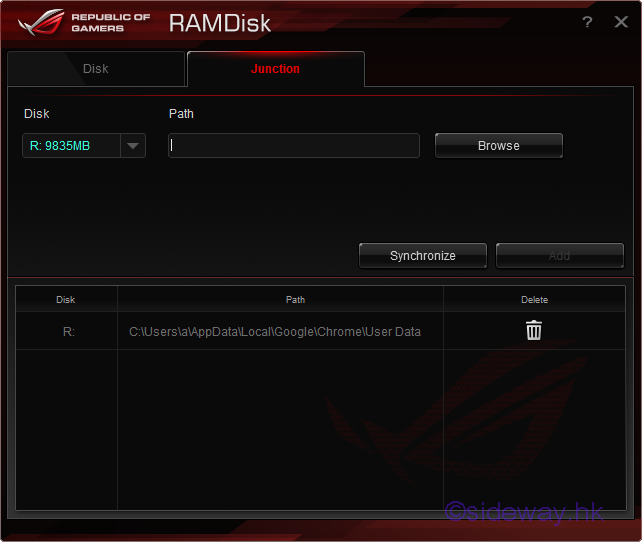
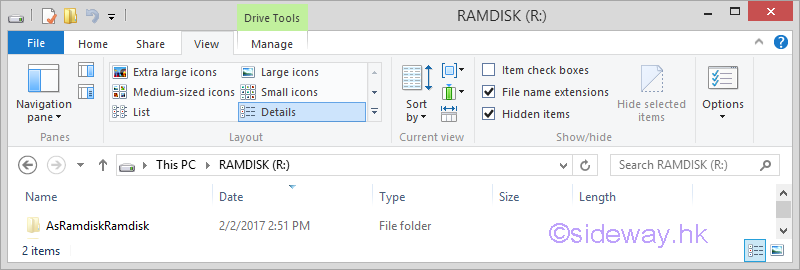
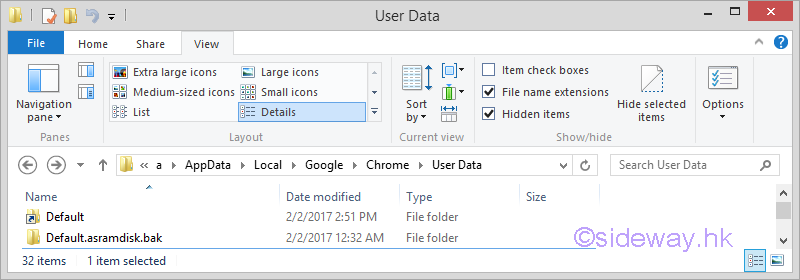
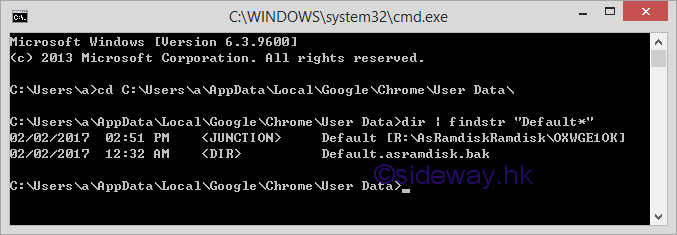
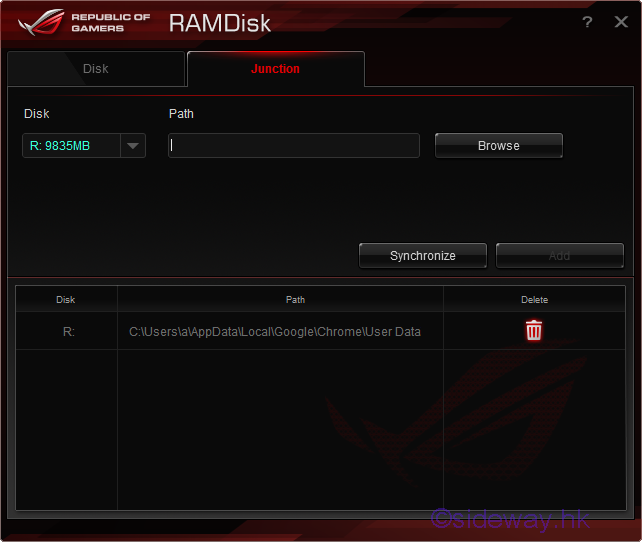
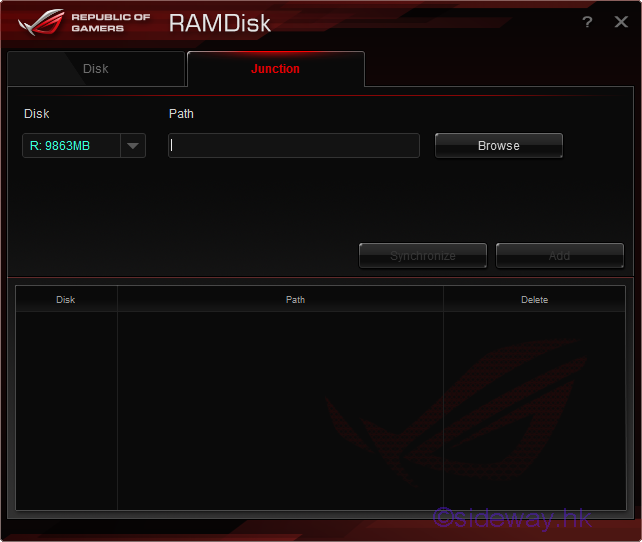
Create a Junction to an ASUS ROG RAMDiskSteps to create a junction to an ASUS ROG RAMDisk .
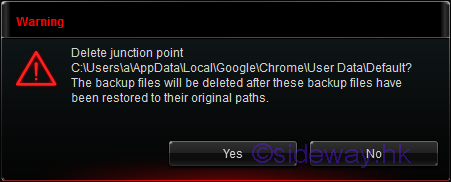
Delete a Junction of an ASUS ROG RAMDiskSteps to delete a junction of an ASUS ROG RAMDisk .
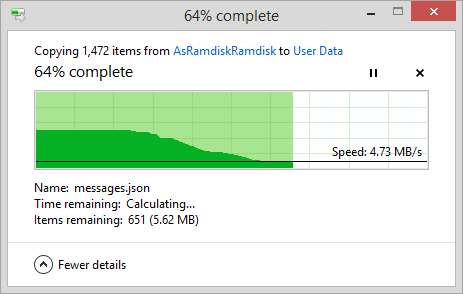
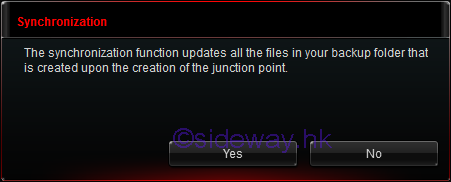
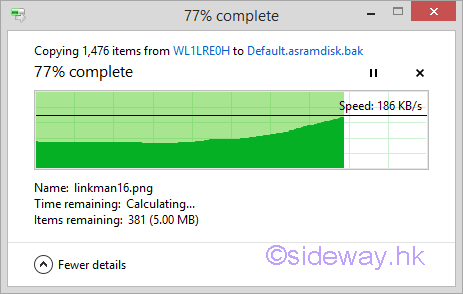
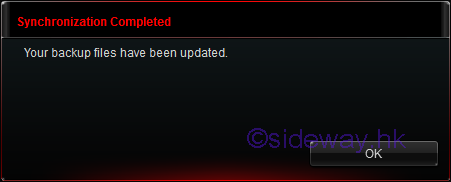
Synchronize All junction Backup Folders with an ASUS ROG RAMDiskSteps to synchronize all junction backup folders with an ASUS ROG RAMDisk.
©sidewayyy ©sideway ID: 170300015 Last Updated: 3/15/2017 Revision: 0 Latest Updated Links
  Nu Html Checker Nu Html Checker  na na |
 Home 5 Business Management HBR 3 Information Recreation Hobbies 8 Culture Chinese 1097 English 339 Reference 79 Computer Hardware 249 Software Application 213 Digitization 32 Latex 52 Manim 205 KB 1 Numeric 19 Programming Web 289 Unicode 504 HTML 66 CSS 65 SVG 46 ASP.NET 270 OS 429 DeskTop 7 Python 72 Knowledge Mathematics Formulas 8 Algebra 84 Number Theory 206 Trigonometry 31 Geometry 34 Calculus 67 Engineering Tables 8 Mechanical Rigid Bodies Statics 92 Dynamics 37 Fluid 5 Control Acoustics 19 Natural Sciences Matter 1 Electric 27 Biology 1 |
Copyright © 2000-2024 Sideway . All rights reserved Disclaimers last modified on 06 September 2019