Microsoft Windows 10 Clean Installation

Clean Installation
 Windows Installation Media
 Steps of Windows 10 Installation
Microsoft Windows 10 Clean Installation
Clean Installation
A clean installation of Windows 10 is the installation of a new copy of Window
10 from scrach by erasing whatever is in the partition. It is referred to as a
"custom install"
Windows Installation Media
A clean installation of Window 10 is always started from booting a Windows 10
installation media in the computer to be installed. A Windows 10 installation media can be a
bootable DVD disc, a bootable ISO file, or a bootable flash drive. An optical drive must be connected
to the computer in order to boot up the computer by the DVD disc. Otherwise a
USB dervice with a copy of properly copied Windows 10 installation files must
be used to boot up the computer by pluging into a USB port of the computer.
Setup the BIOS of the computer such that the computer can boot from the correct
installation device.
Steps of Windows 10 Installation
Detailed steps of Windows 10 installation.
Insert the correct Windows 10 installation media to the computer device and power on the computer. After the standard BIOS boot up process, the Windows 10 installation media will load some files to the computer for starting the Windows 10 installation process.
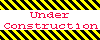
A 'Windows Boot Manager' window will pop out for selecting an operating system to start if multiple operating systems installation media is used. Select the correct operating system and press 'Enter' key to continue.
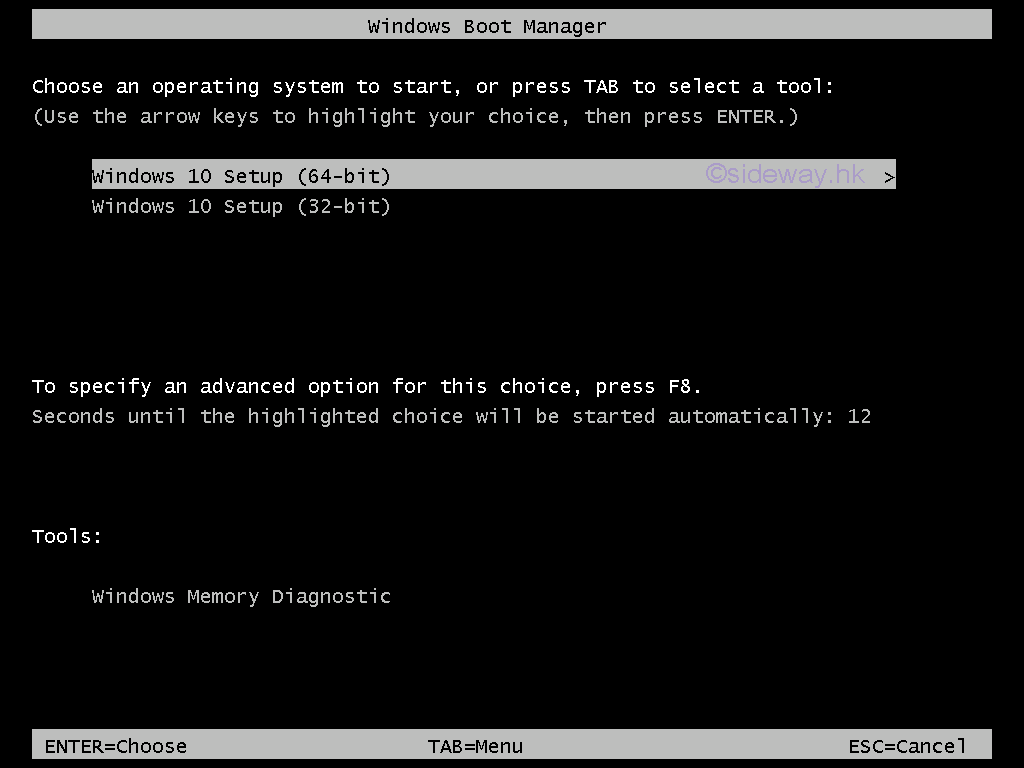
The 'Loading file' splash screen will pop out to show that the Windows 10 setup prepartion is starting propertly.
A 'Windows' splash screen will then pop out to show that the Windows 10 setup process is starting propertly.
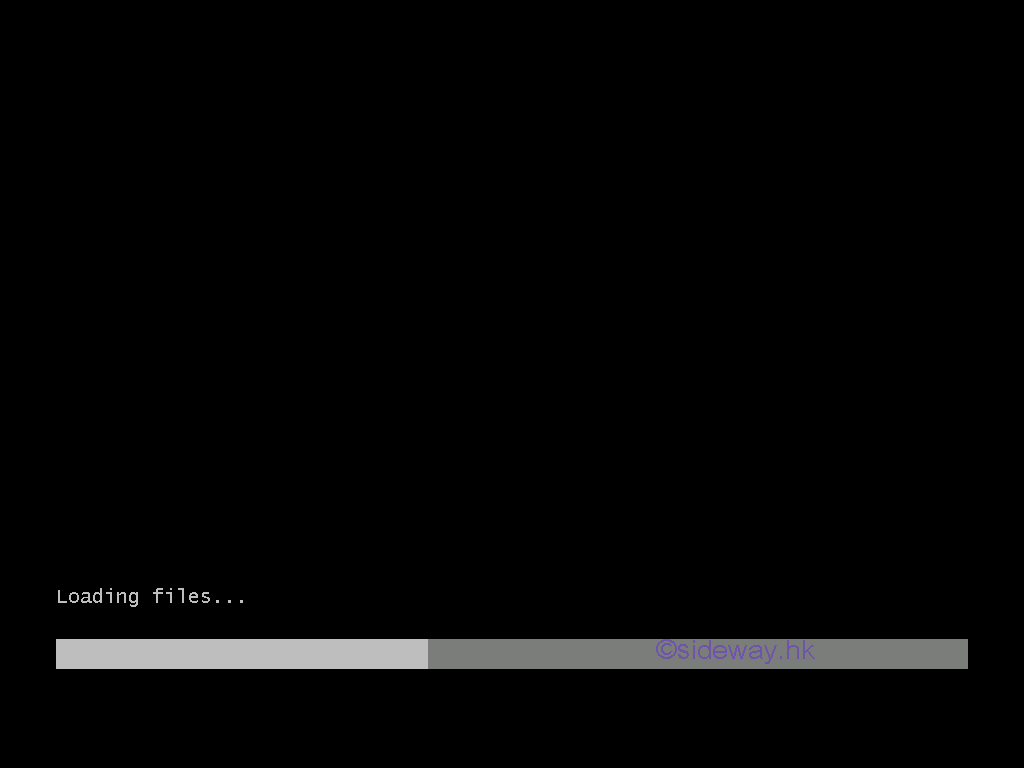
A 'winpeshl.exe' widnow will pop out to show that the Windows 10 setup process is being processed.
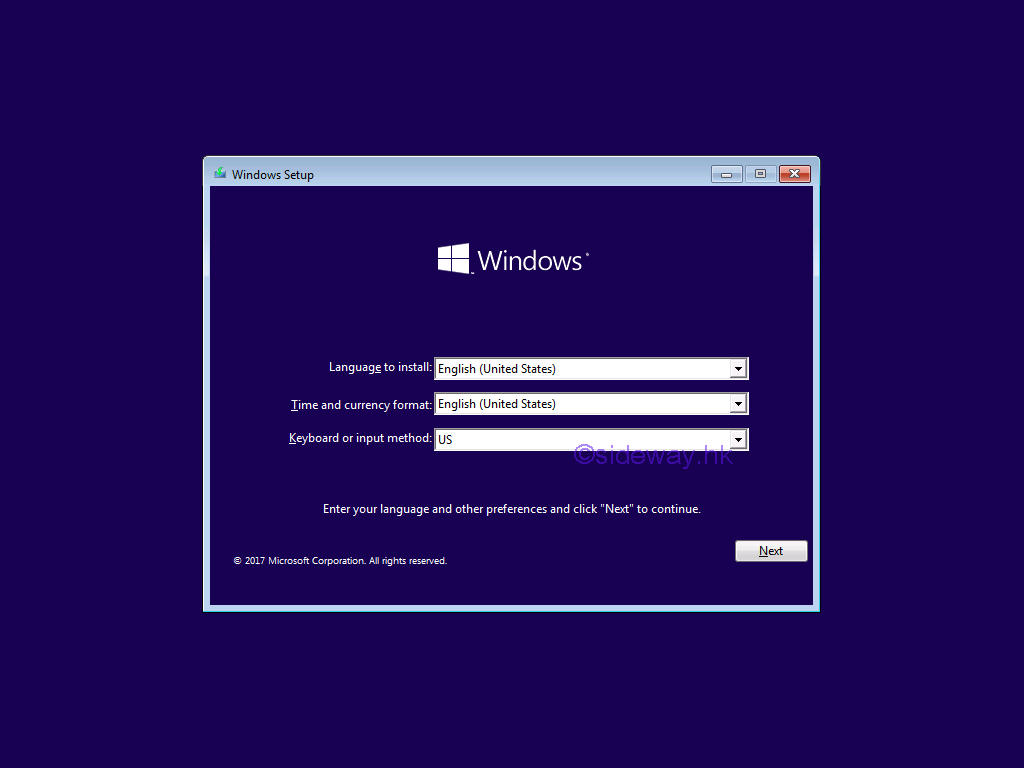
A 'Windows Setup: Preferences' window will pop out to guide Windows 10 setup and installation. Enter the preferences, "Language to install", "Time and currency format", and "Keyboard or input method", and then click 'Next' button to continue.
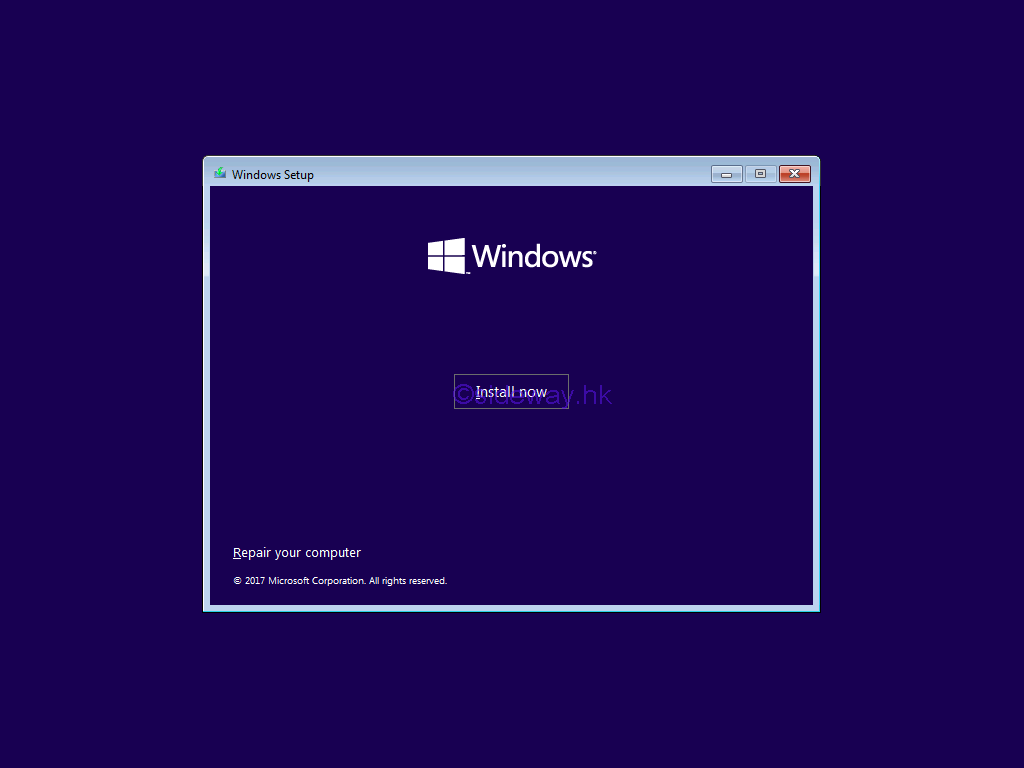
After entering the preferences, a 'Windows Setup: Install Now' window will pop out. Click 'Install now' button to confirm and activate the Windows 10 installation process.
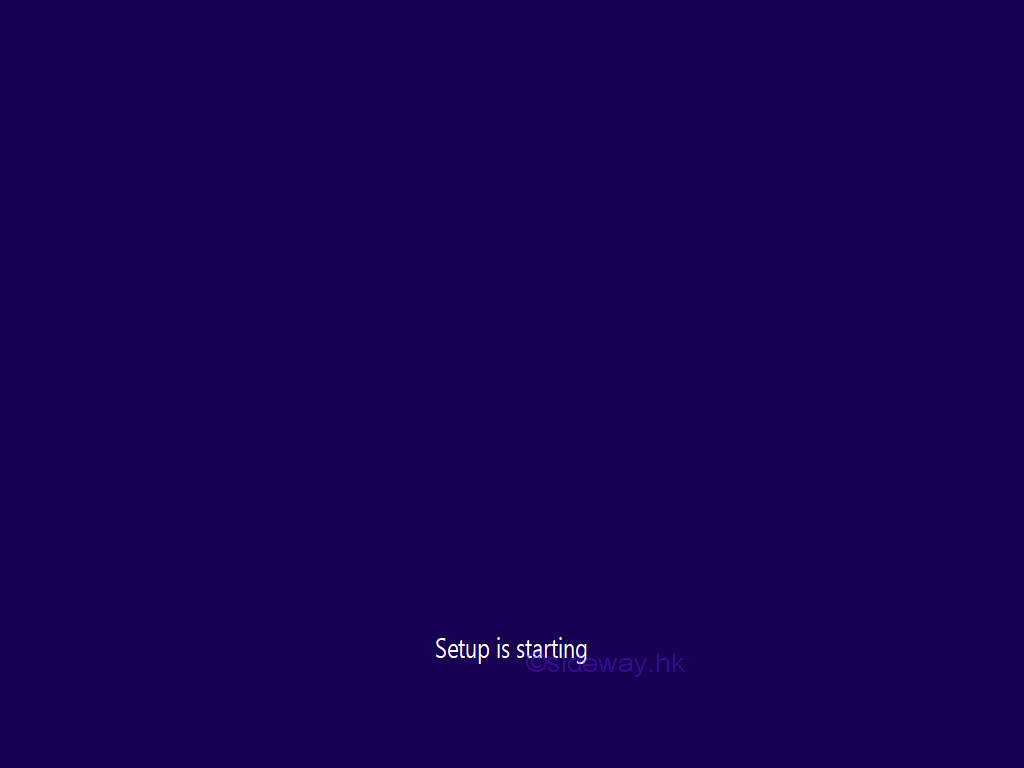
After confirming, a 'Setup is Starting' splash screen will pop out to show that the Windows 10 setup is starting propertly.
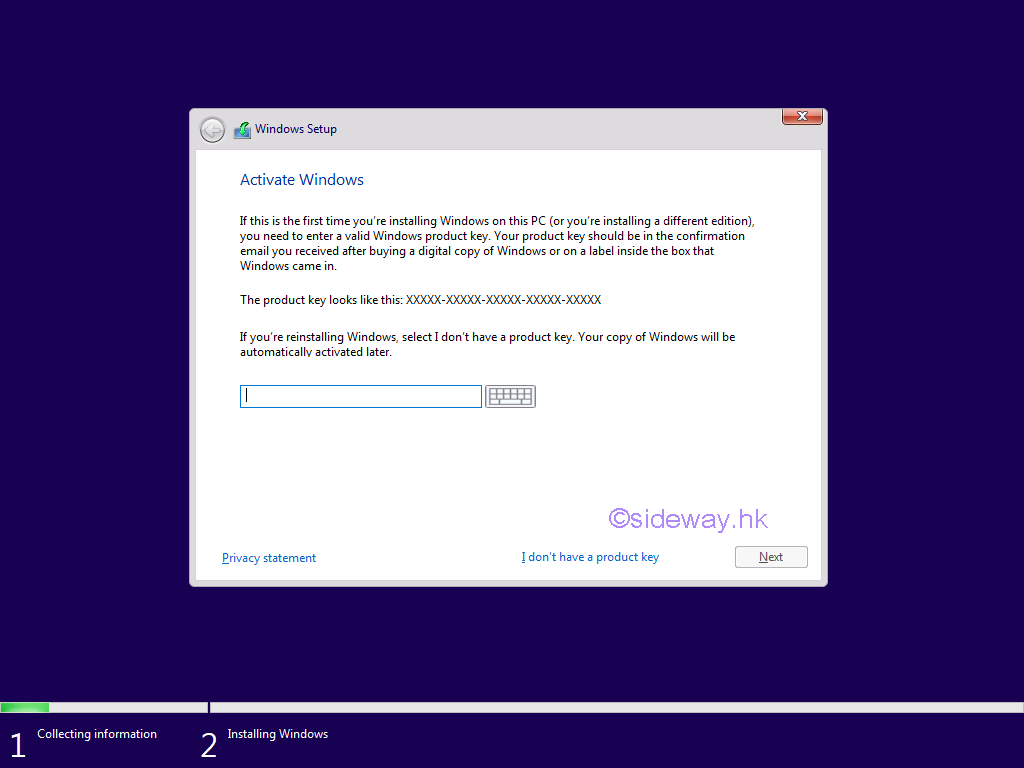
After setup preparation, a 'Windows Setup: Activate Windows' window will pop out. Enter 'product key' in the text box and click 'Next' button to continue, or press the 'I don't have a product key' hyperlink to continue.
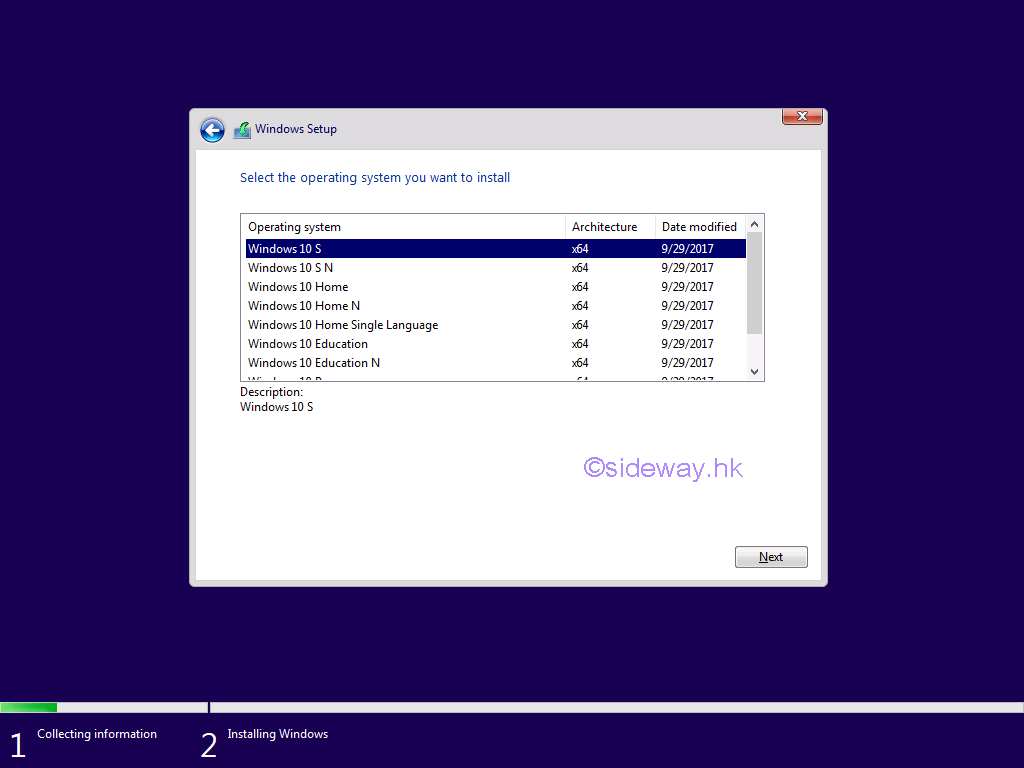
If multiple operating systems installation media is used, a 'Windows Setup: operating systems' window will pop out. Select the correct operating system to be installed, and click 'Next' button to continue.
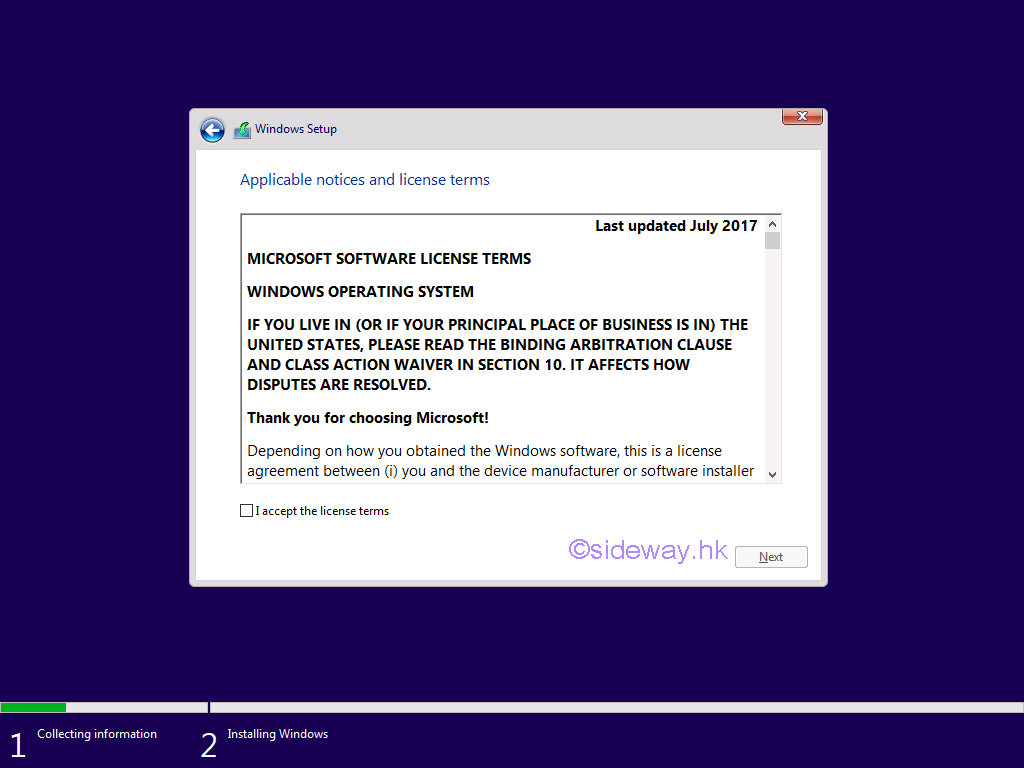
After selecting the type of operating system, a 'Windows Setup: Applicable notices and license terms' window will pop out. Check 'I accept the license terms' box, and click 'Next' button to continue.
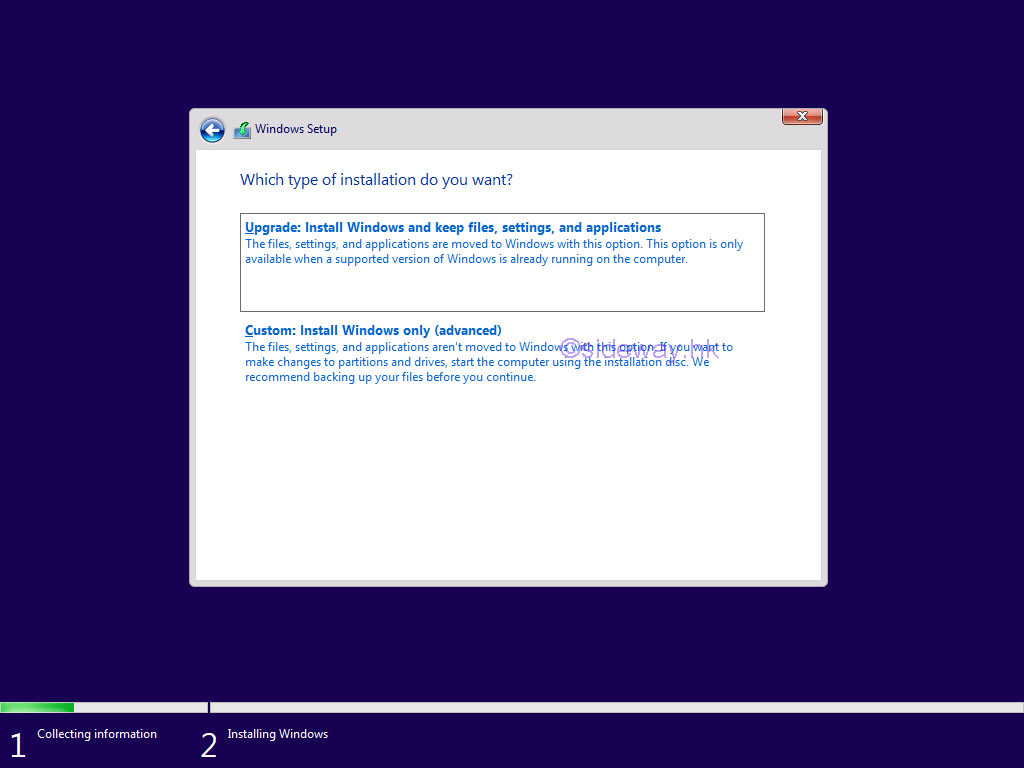
After accepting the terms, a 'Windows Setup: Type of installation' window will pop out. Click 'Custom: Install Windows only (advanced)' hyperlink to continue.
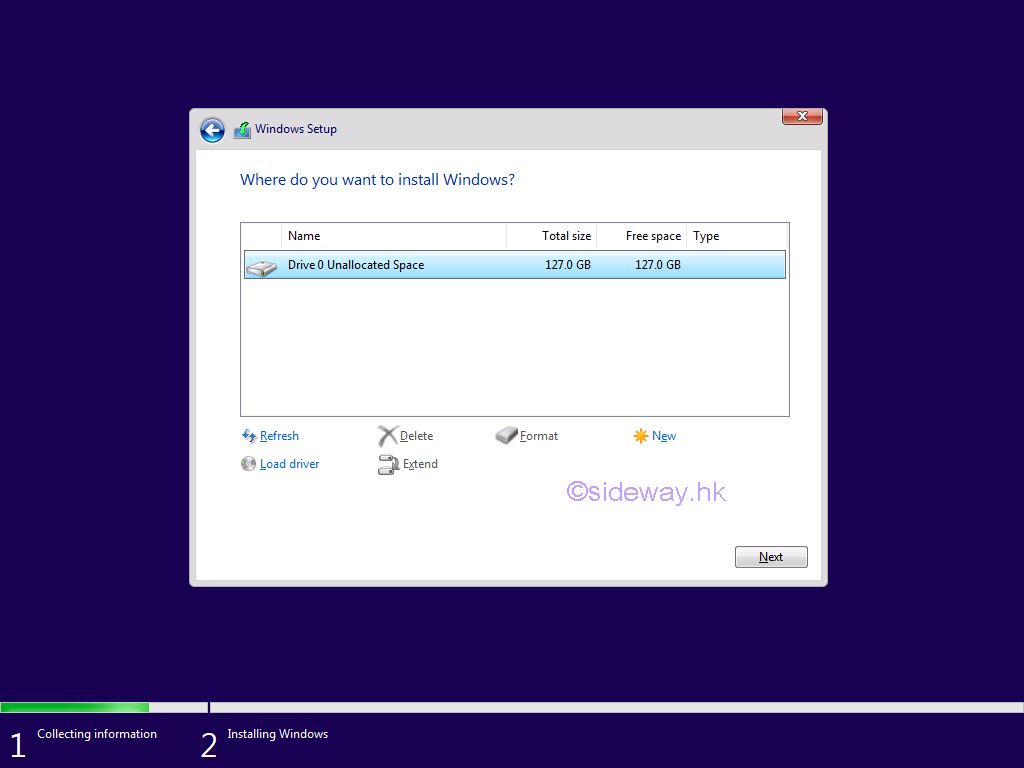
After selecting installation type, a 'Windows Setup: Where to install Windows' window will pop out. Select and highligh the correct partition or drive, and click 'Next' button to continue.
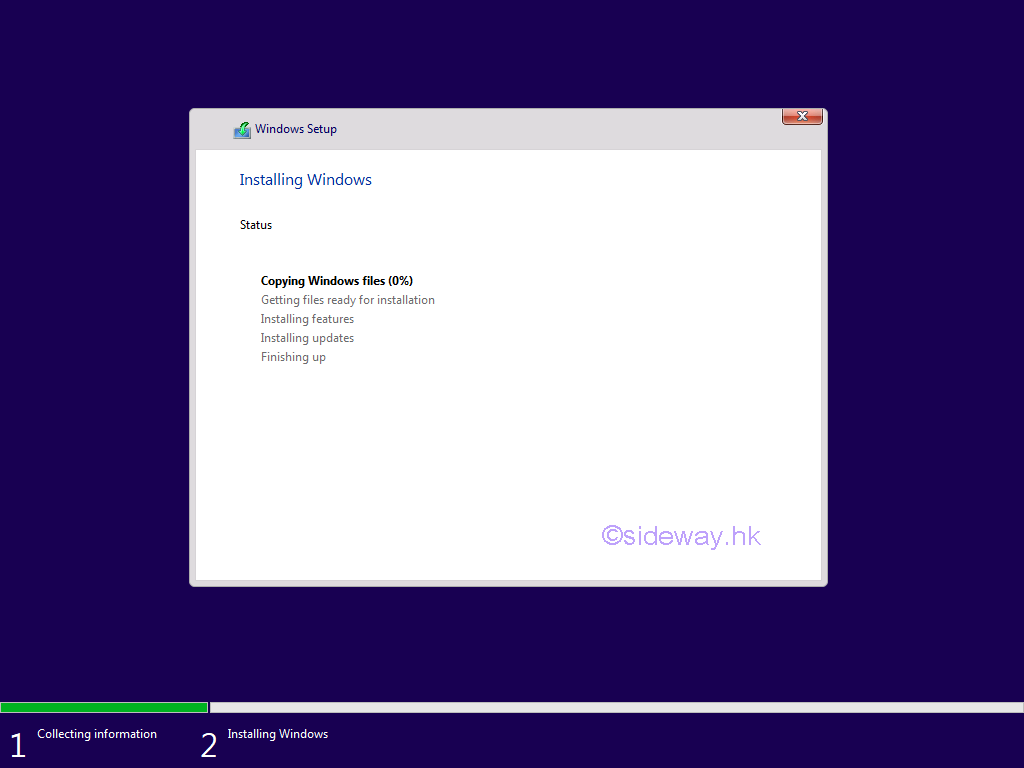
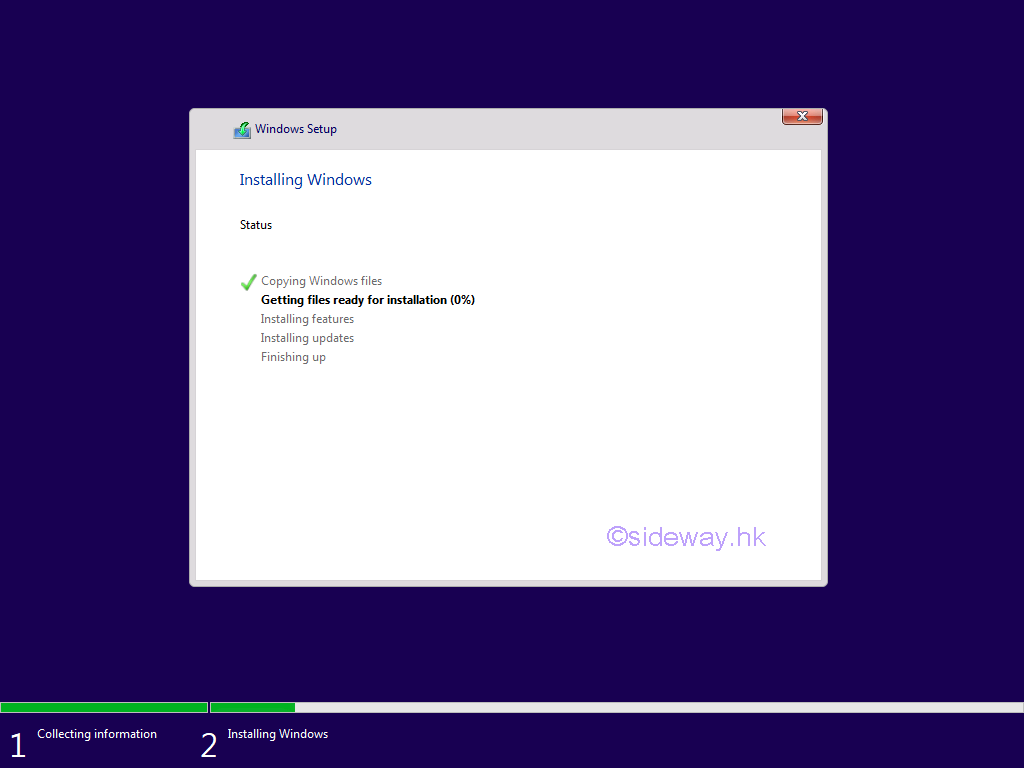
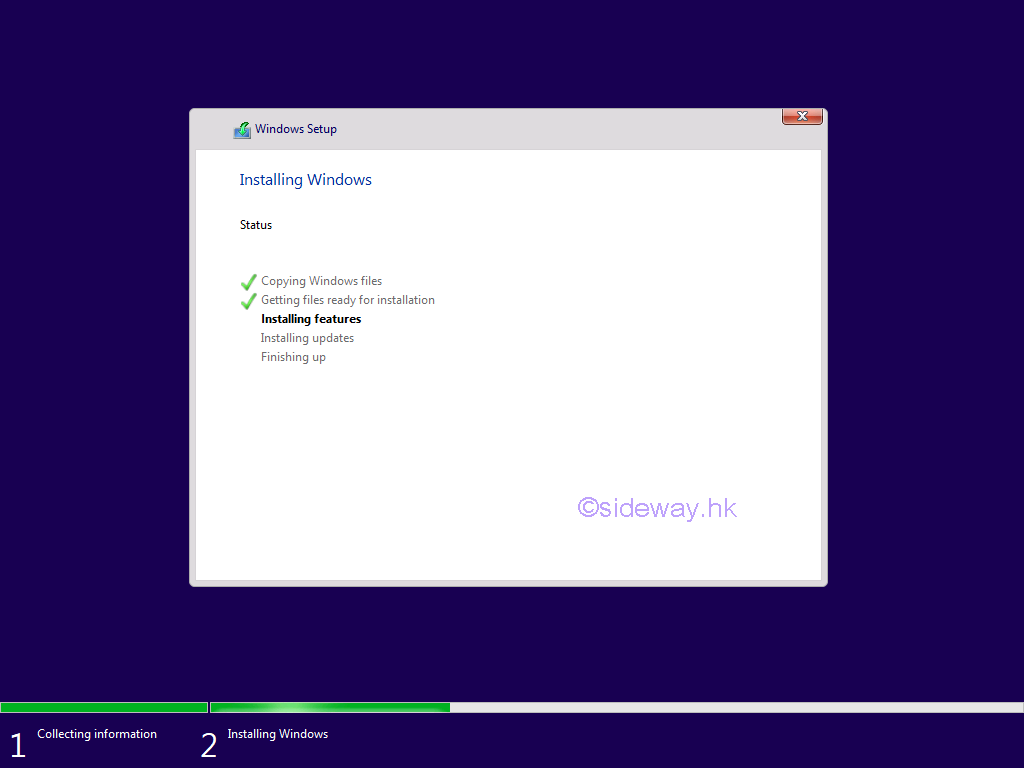
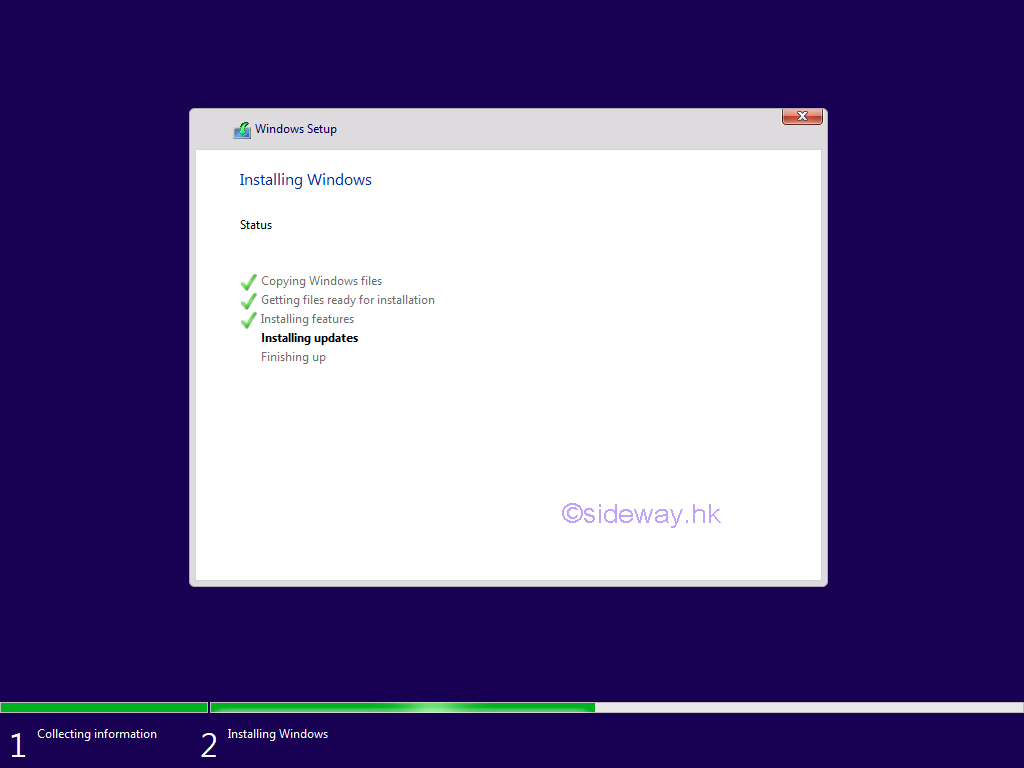
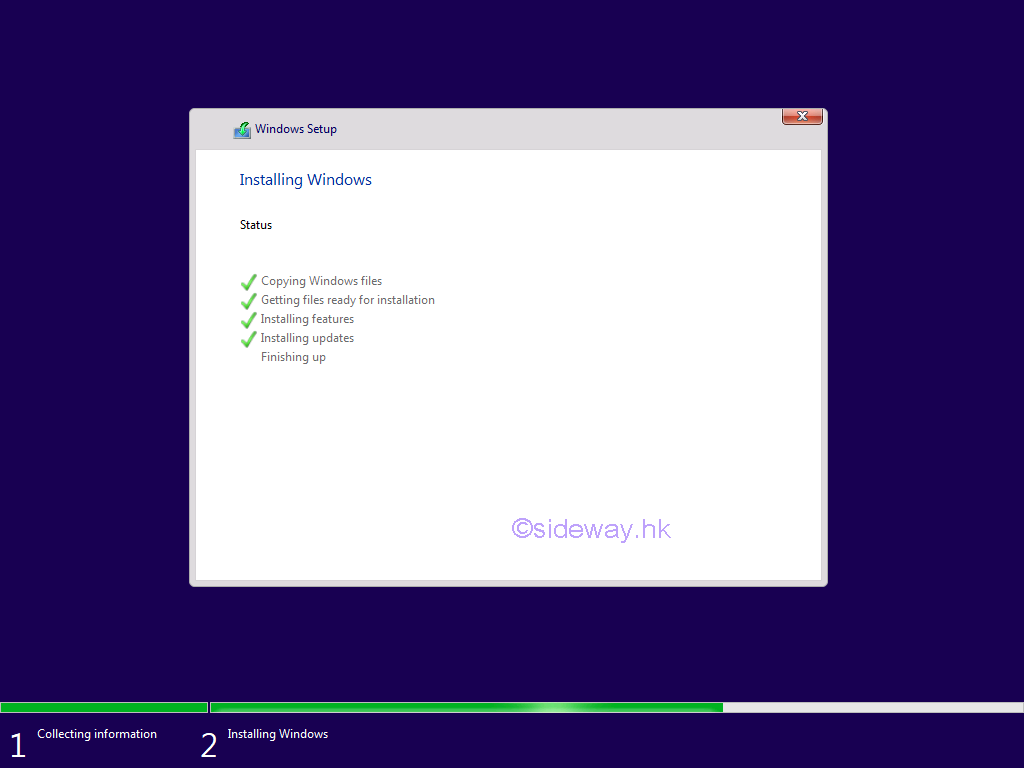
After selecting the partition, a 'Windows Setup: Installing Windows' window will pop out to show the status of installion process.
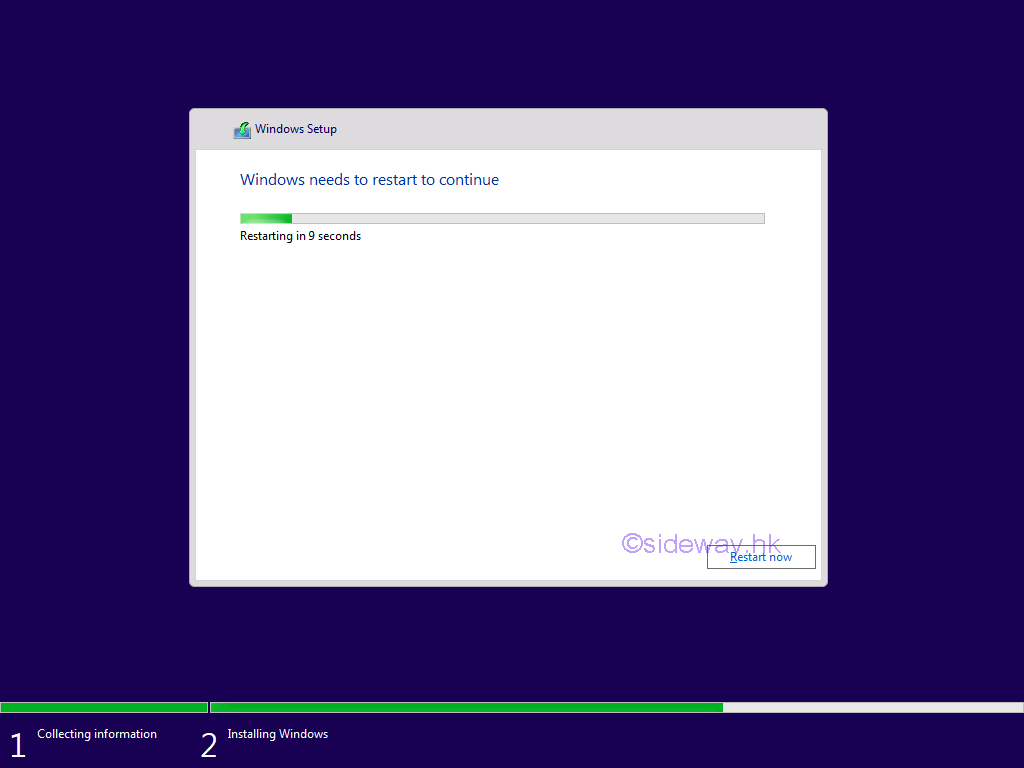
After finishing up, a 'Windows Setup: Restart to continue' window will pop out. The Windows 10 installation process is paused. Remove the Windows 10 installation media from the computer to allow booting from the installed partition or drive. Then wait Windows Setup to restart automatically, or click 'Restart now' button to continue.
If the Windows 10 installation media is not remove. a 'Press any key to boot from CD or DVD' countdown screen will pop out to confirm the re-installation of the Windows 10 after restarting. Or the installation process will restarts automatically after the countdown.
After restarting, a 'Windows' splash screen will pop out to show that the installation process is being restarted.
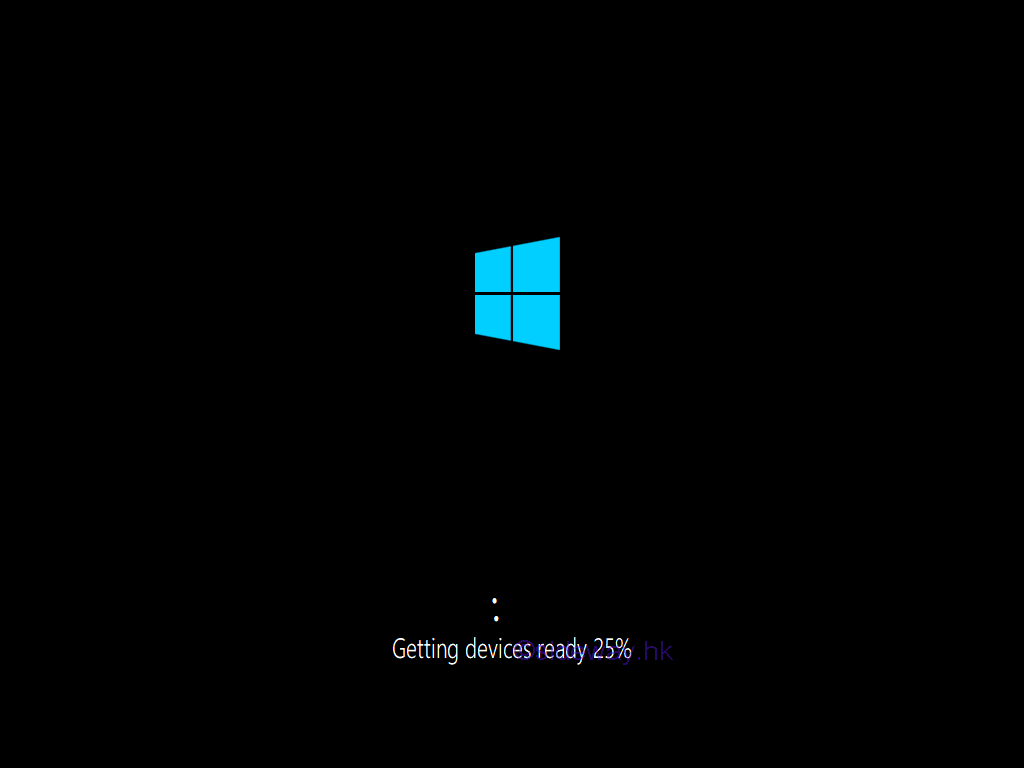
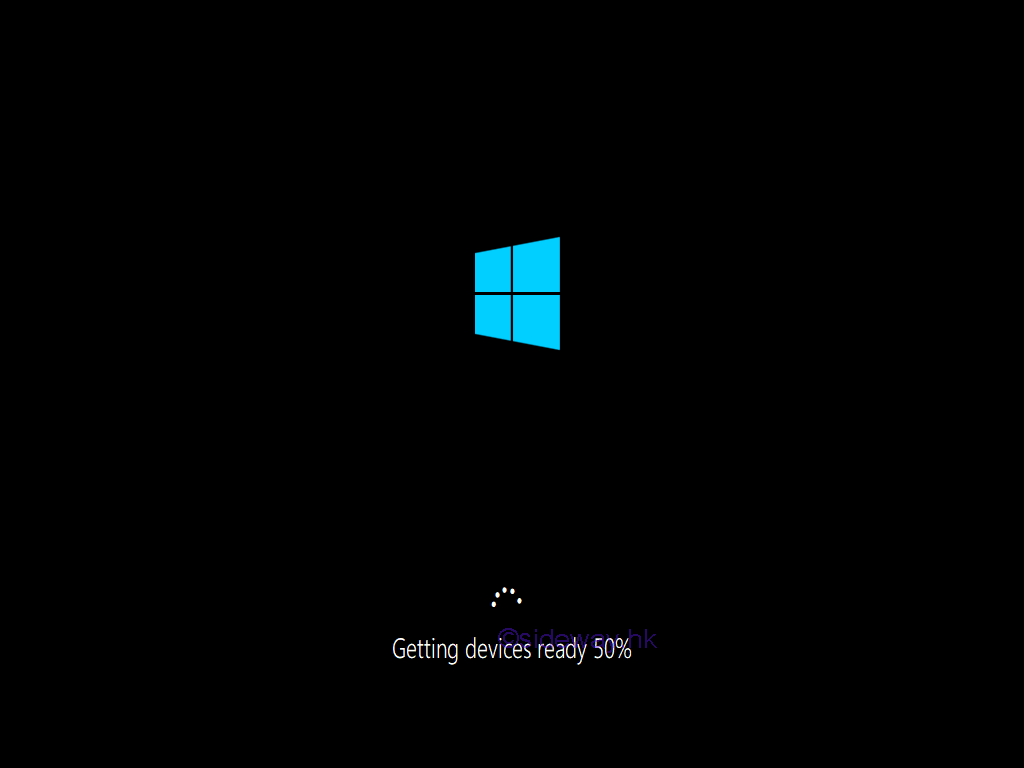
A 'Getting devices ready' splash screen will then pop out to show that the initial getting devices ready process is being started.
After initializing needed devices, a 'Starting services' splash screen will then pop out to show that the initial services are being started.
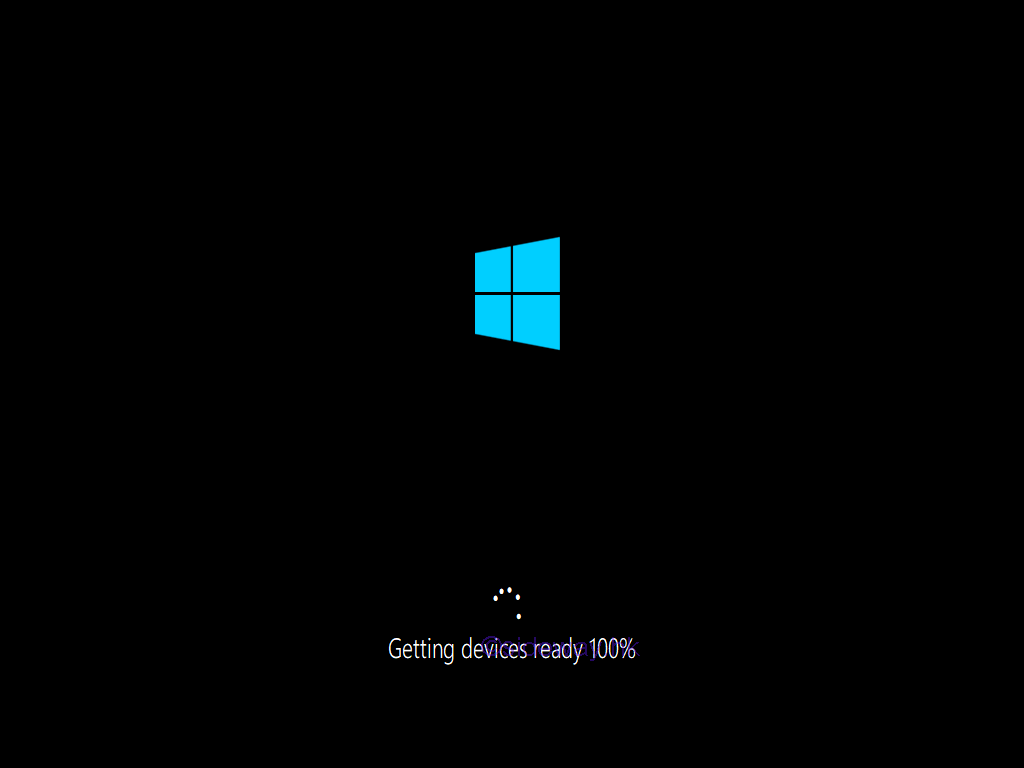
After initializing needed services, a 'Getting devices ready' splash screen will then pop out to show that the final getting devices ready process is being started.
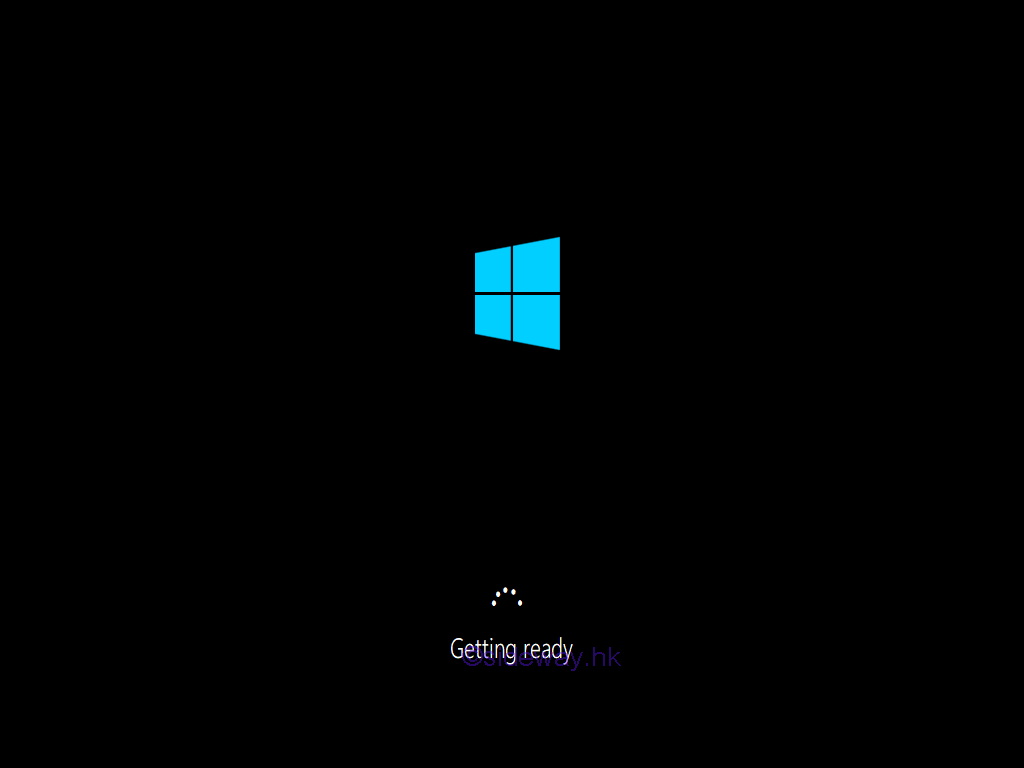
After getting devices reday, a 'Getting Ready' splash screen will pop out to show that the getting computer ready process is being started.
After getting ready, if the Windows 10 installation media is not remove. a 'Press any key to boot from CD or DVD' countdown screen will pop out to confirm the re-installation of the Windows 10 after restarting. Or the installation process will restarts automatically after the countdown.
After restarting the computer, a 'Window' splash screen will pop out to show that the restarting process is being started.
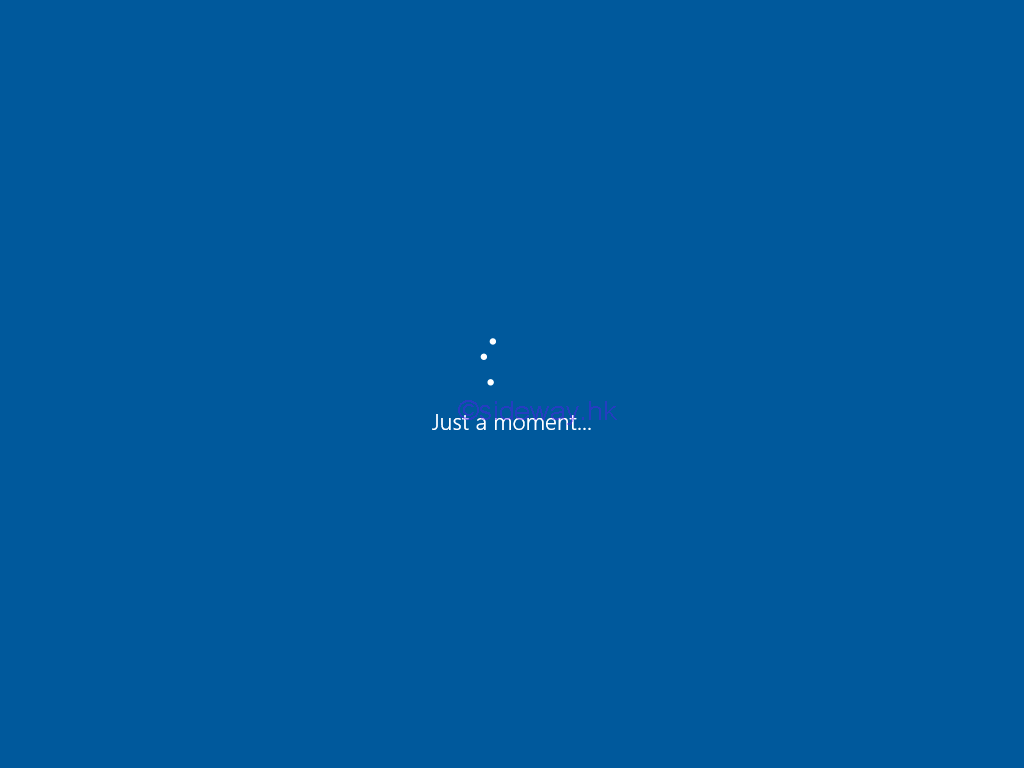
After restarting the installation process, a 'Just a moment' splash screen will pop out to show that the installation process is being continued.
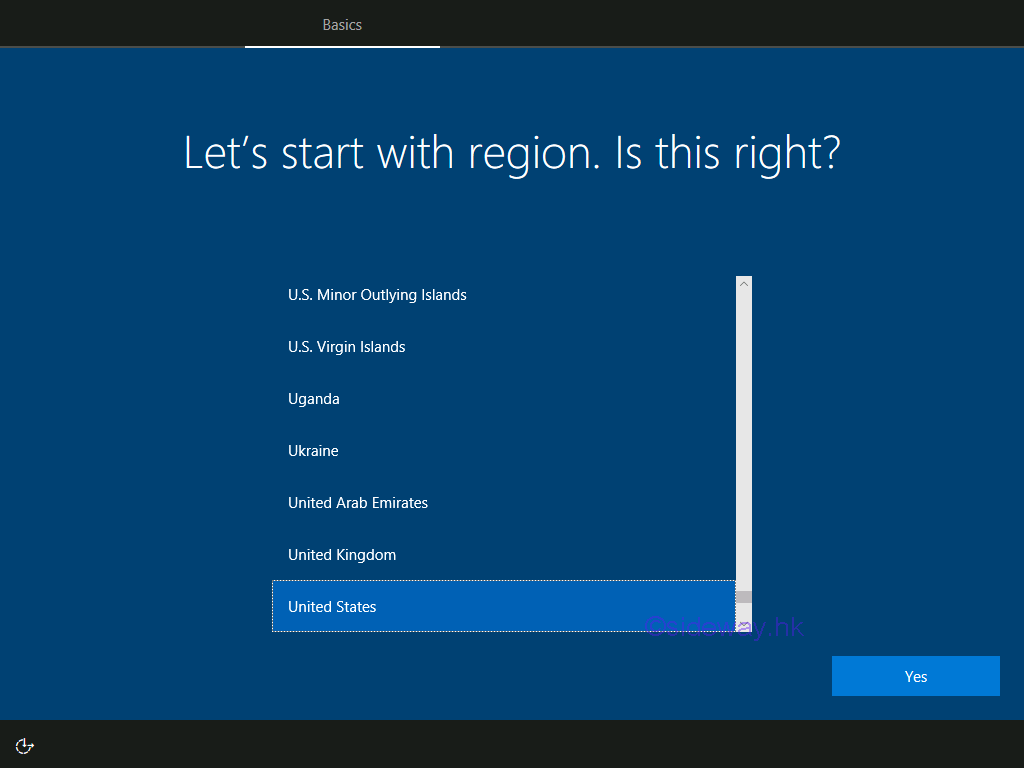
After finishing up the installation process, a 'start with region' window will pop out to show that the personalise process is being stared. Slide to select and highlight the correct region. Click 'Yes' button to confirm and continue.
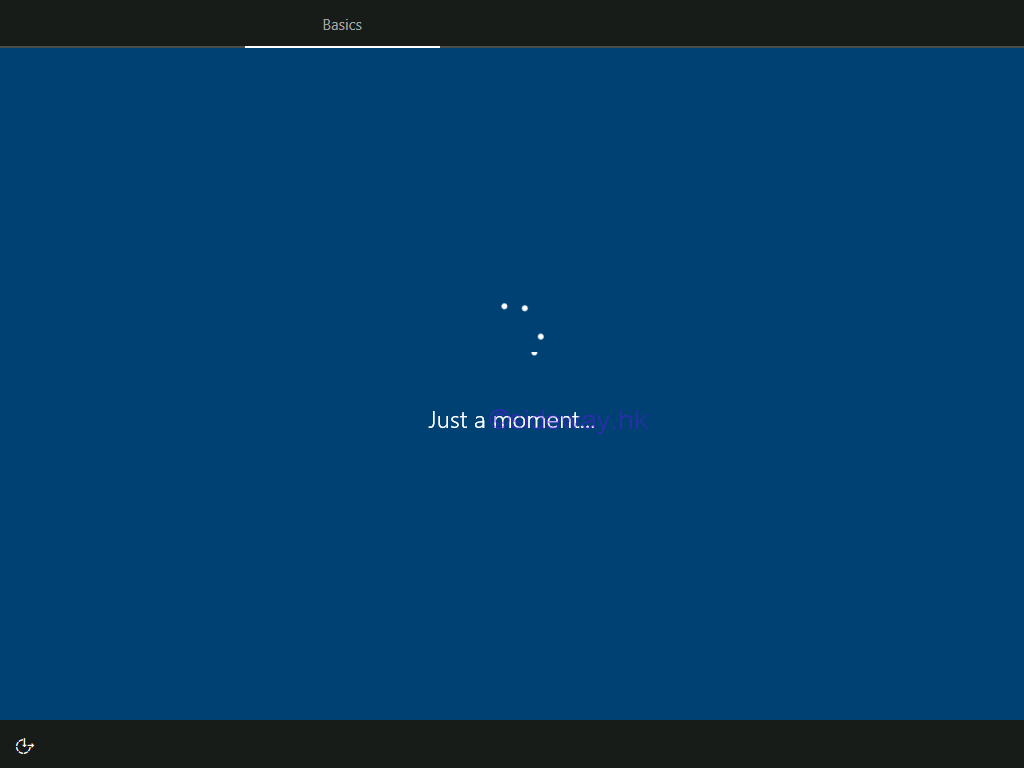
A 'Just a moment' splash screen will pop out to show that the personalise process for region is being stared.
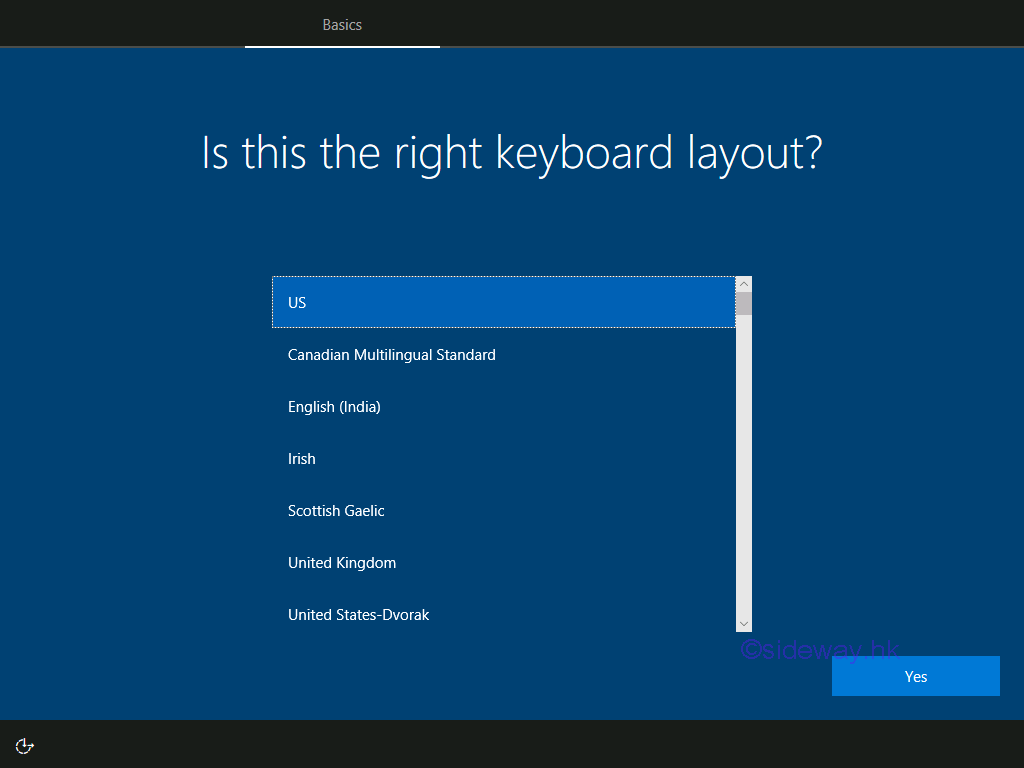
After finishing region setup, a 'keyboard layout' window will pop out to show that the personalise process for keyboard layout is being stared. Slide to select and highlight the correct keyboard layout. Click 'Yes' button to confirm and continue.
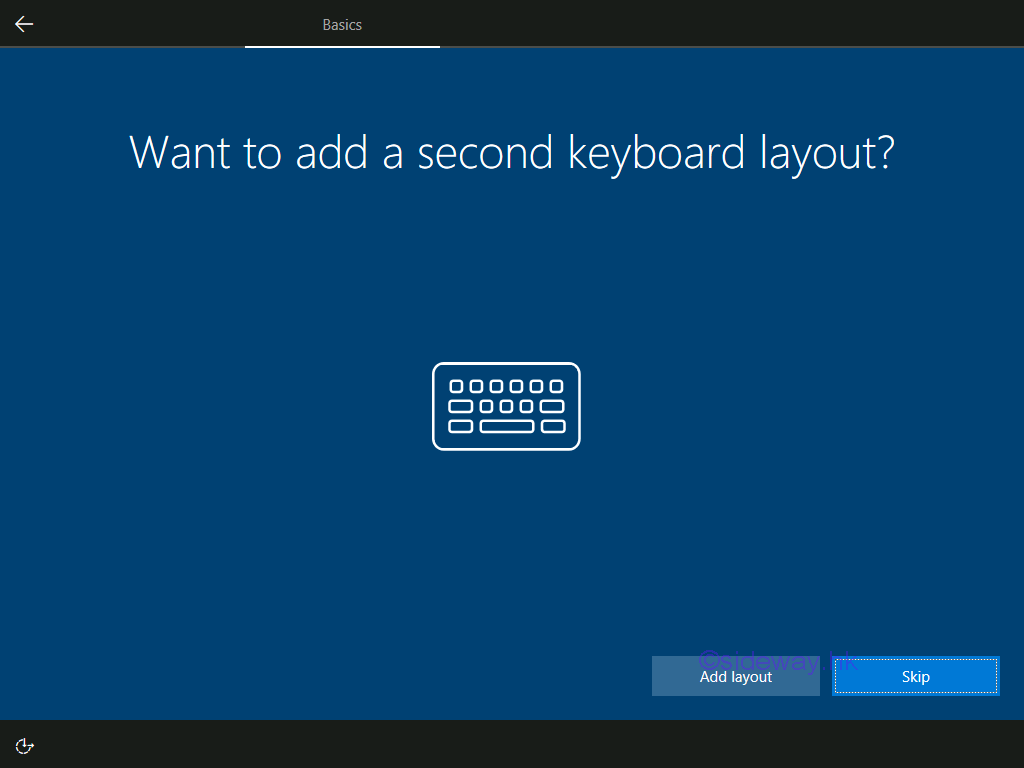
A 'second keyboard layout' window will pop out for adding a second keyboard layout. Slide to select and highlight the correct keyboard layout. Click 'skip' button to add latee and continue the installation process.
A 'Just a moment' splash screen will pop out to show that the personalise process for keyboard layout is being stared.
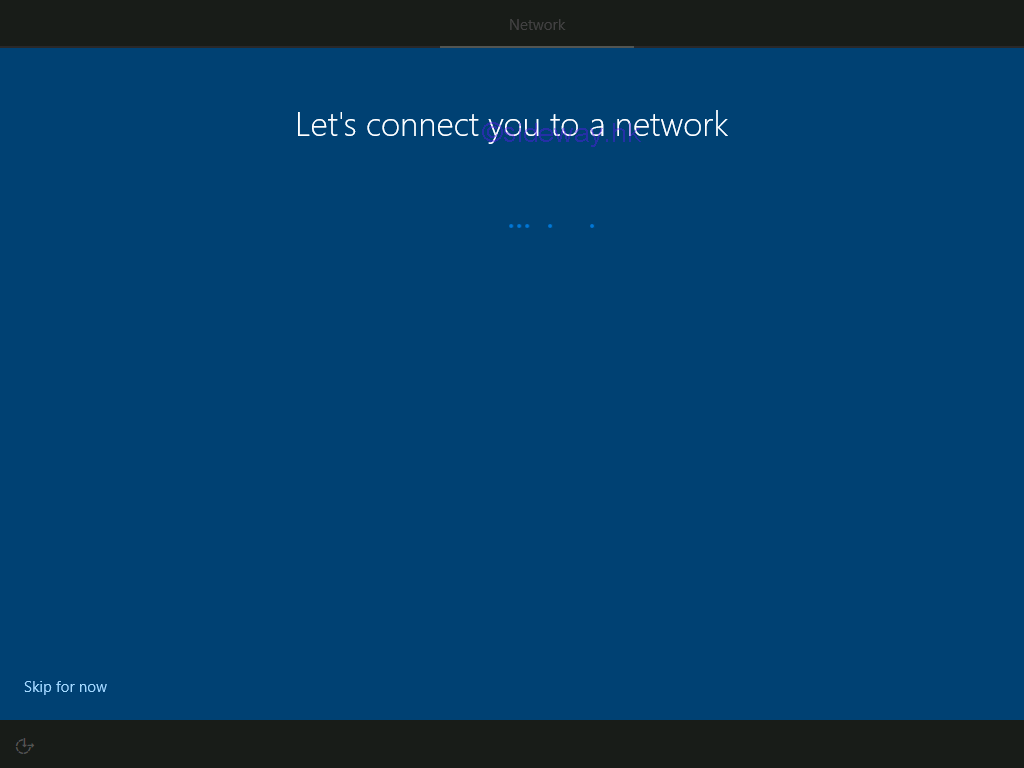
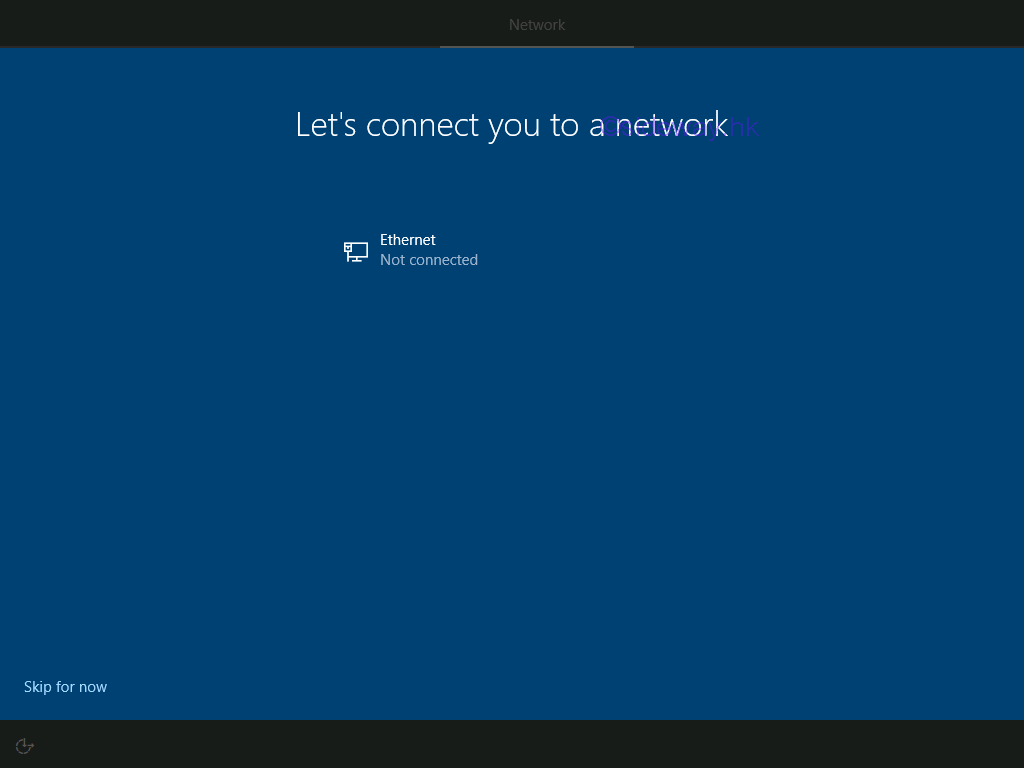
After finishing keyboard layout setup, a 'connect to a network' window will pop out to show that the personalise process for network is being stared. Click 'Skip for now' hyperlink or the installation process will search for available network automatically.
After searching available network, a 'updated connect to a network' window will pop out to show that the searching for network is completed. Click 'Skip for now' hyperlink to continued.
A 'Just a moment' splash screen will pop out to show that the personalise process for network is being stared.
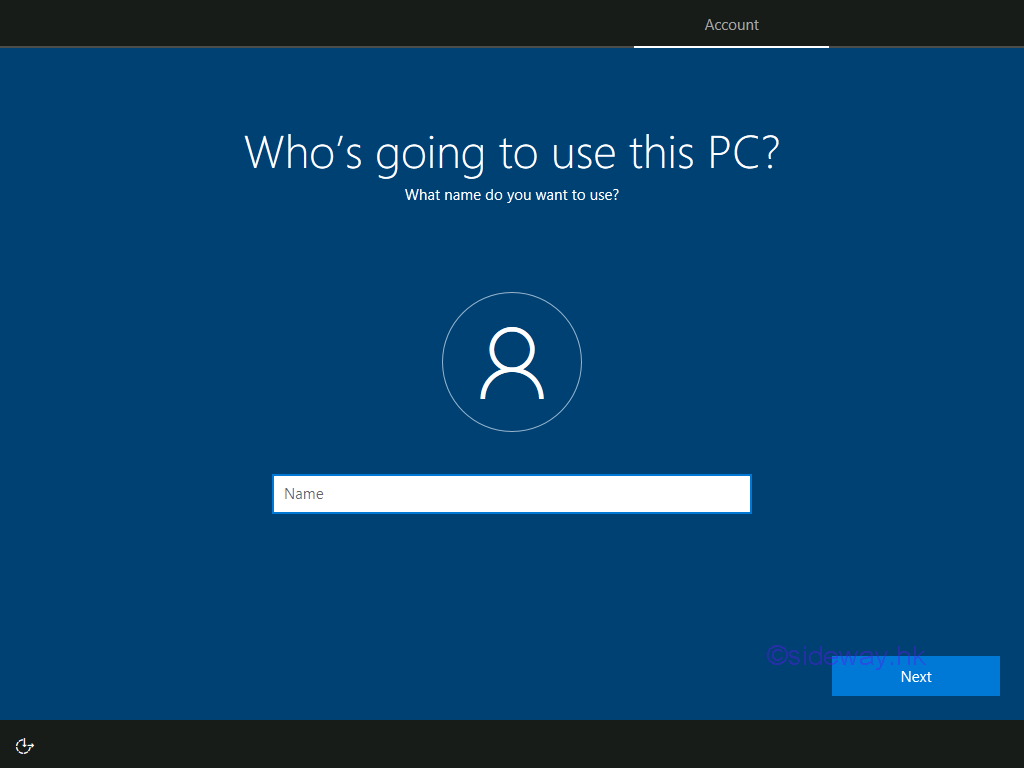
After finishing network setup, a 'Who use this PC' window will pop out to show that the personalise process for creating user is being stared. Enter the name in the textbox, and click 'Next' button to continue.
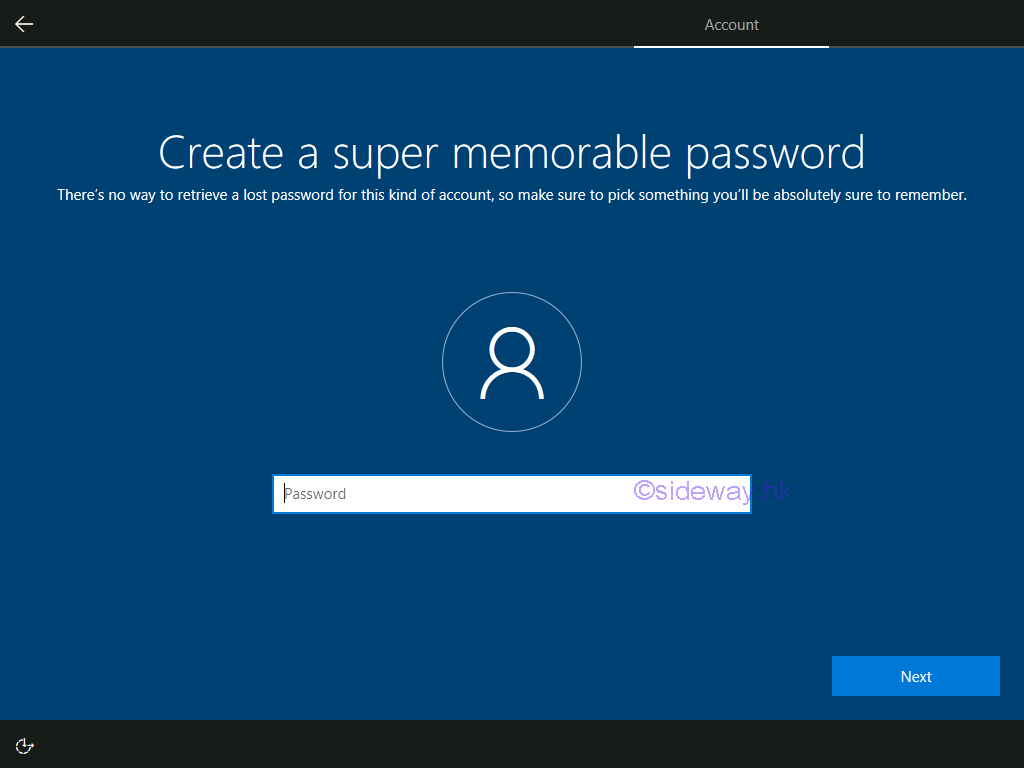
A 'Create password' window will pop out to ask for entering the password of the used. Enter the password in the textbox, and click 'Next' buttonto continue.
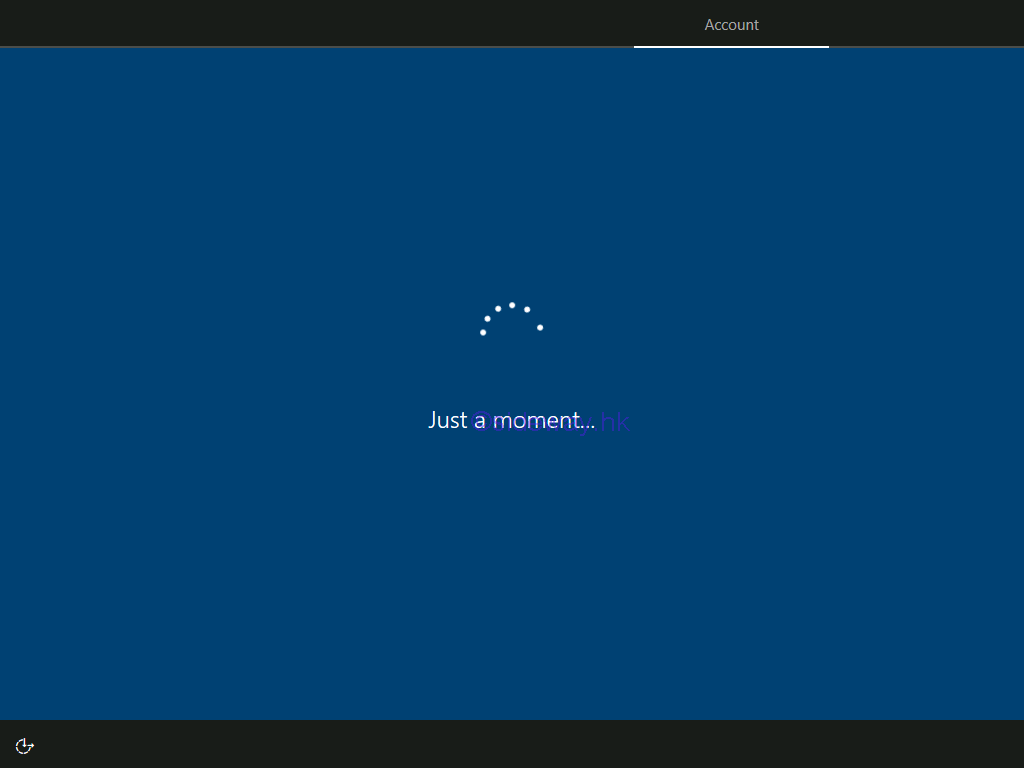
A 'Just a moment' splash screen will pop out to show that the personalise process for user is being stared.
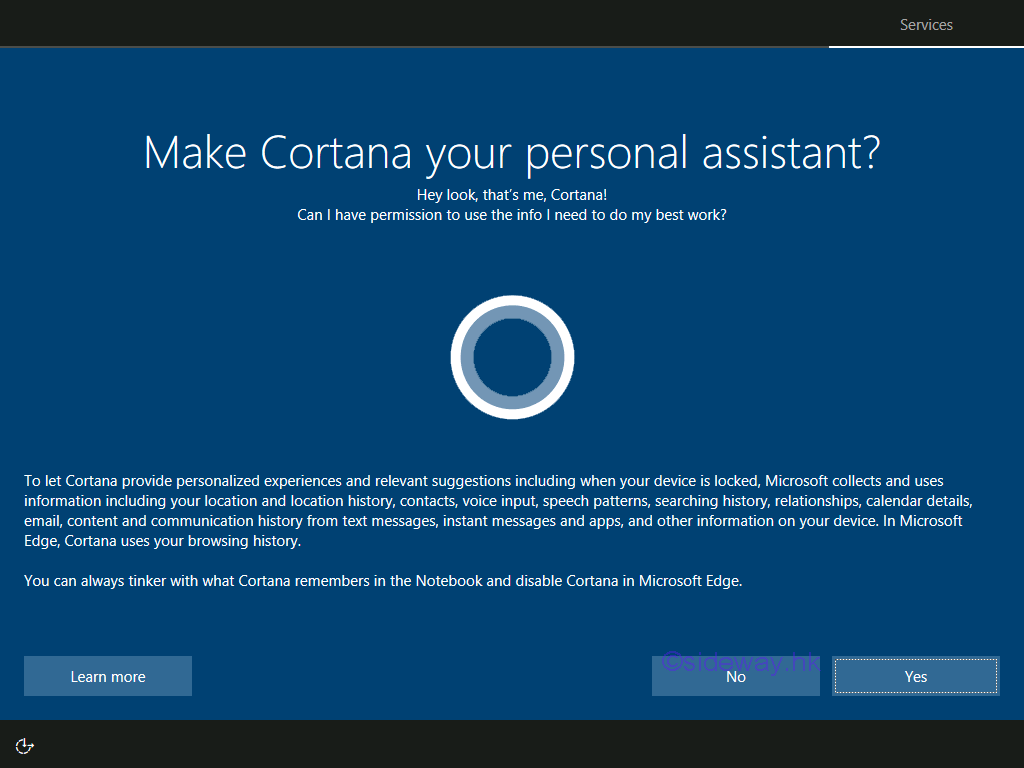
After finishing user setup, a 'Make Cortana personal assistant' window will pop out to ask for setting the Windows assistant. Click 'Yes'or 'No' button to continue.
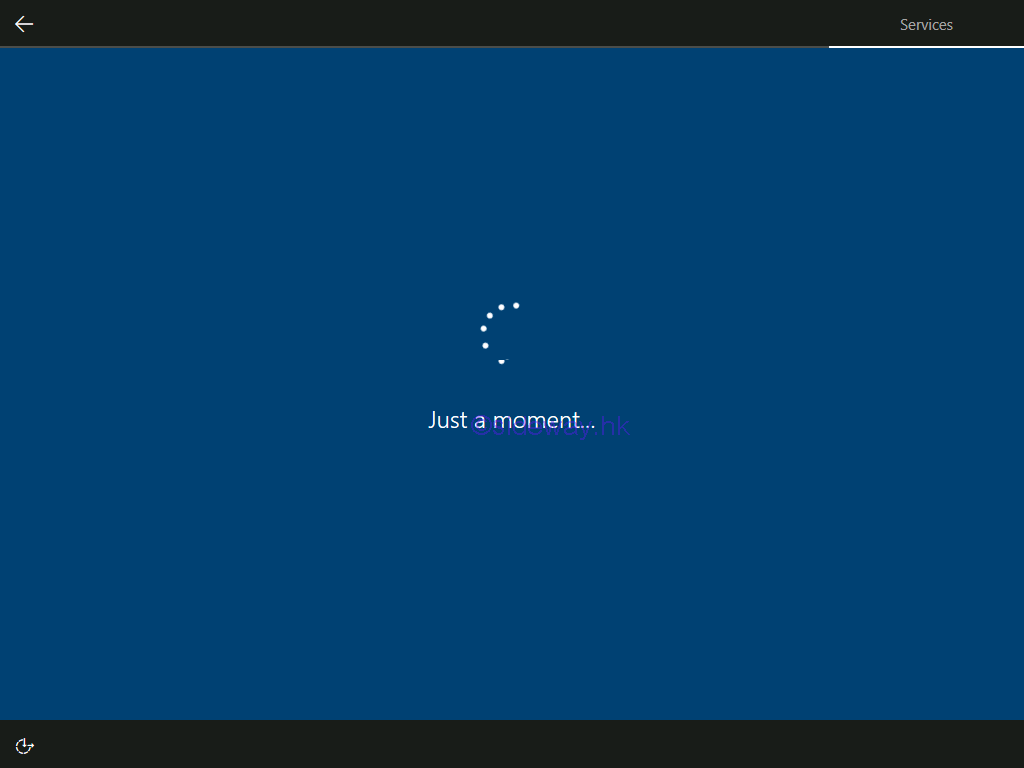
A 'Just a moment' splash screen will pop out to show that the personalise process for Windows assistant is being stared.
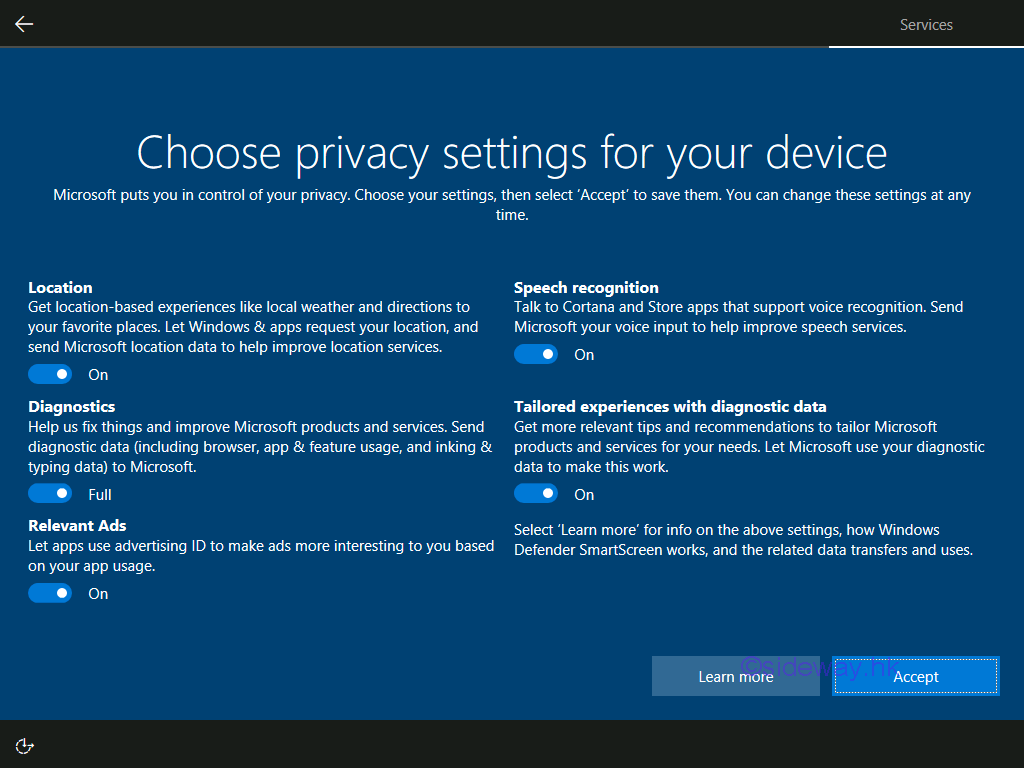
After finishing user setup, a 'privacy setting' window will pop out to ask for setting the device privacy. Switch the corresponding privacy setting to 'On' or 'Off' accordingly, and click 'Accept' button to continue.
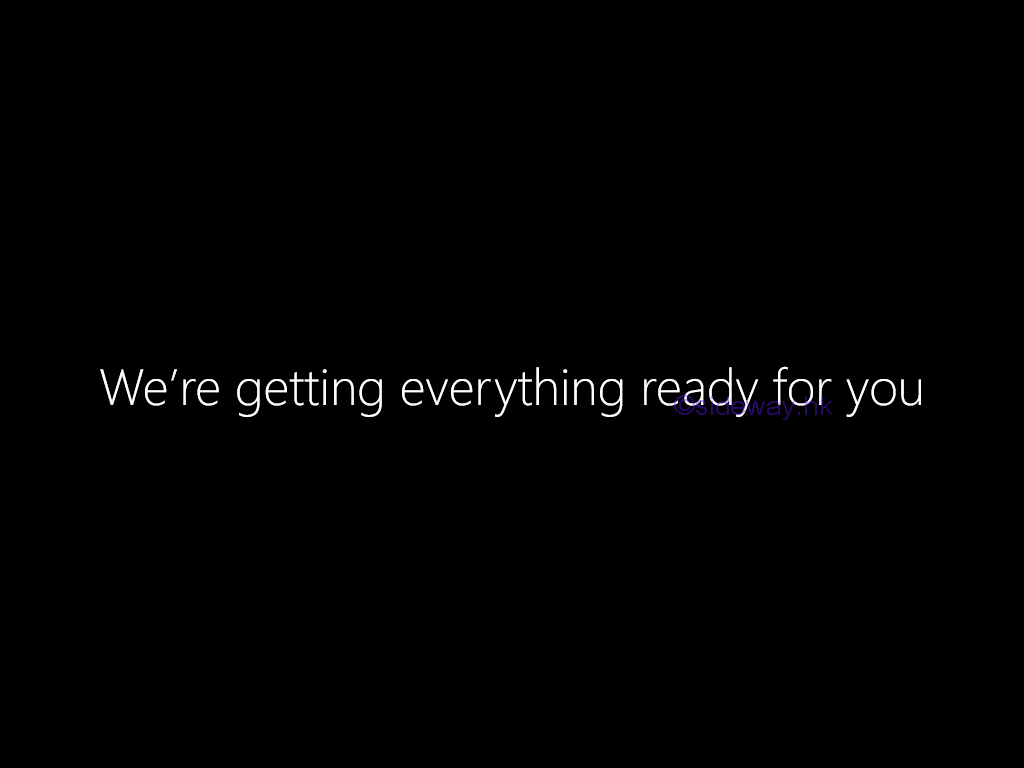
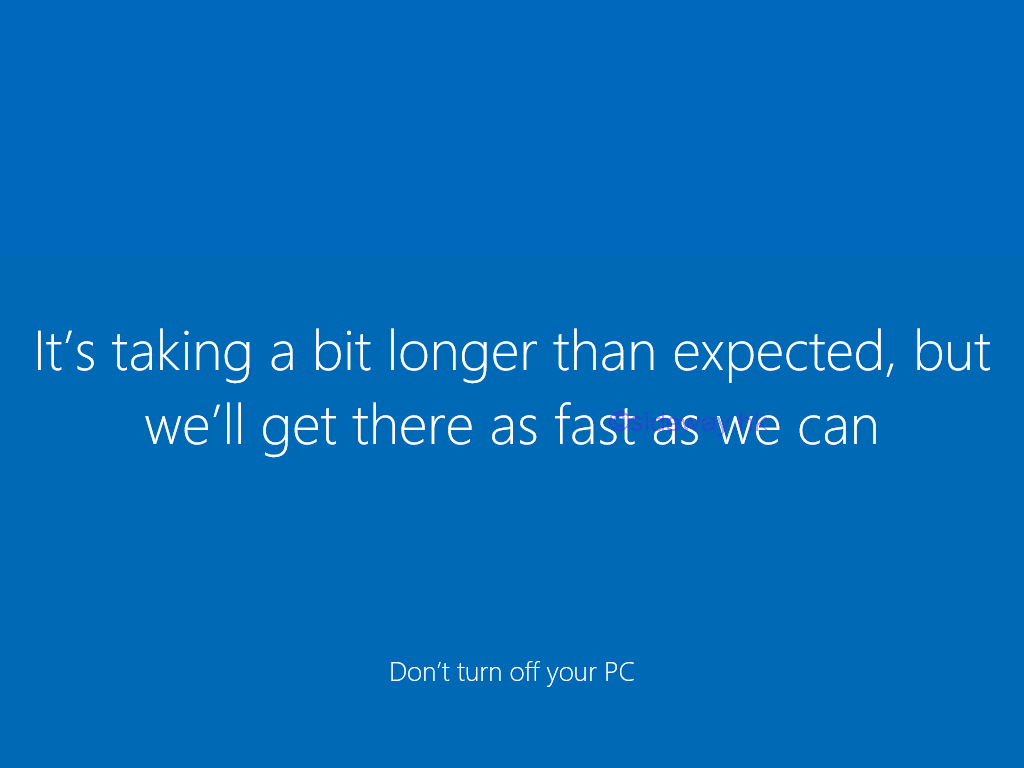
A 'Just a moment' splash screen will pop out to show that the finishing up process is being started.
After finishing preparation process, a series of splash screens will then pop out to show the getting ready process is being started.
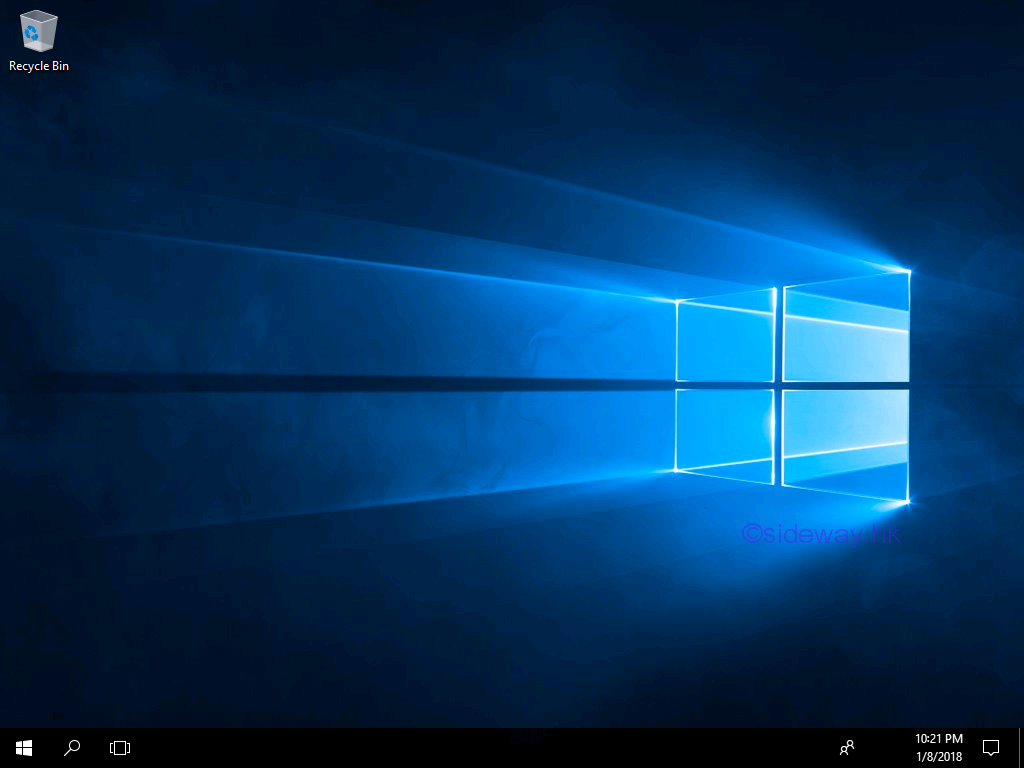
After getting everything ready, 'Windows 10 Desktop' window will pop out to show that the Windows 10 is being started. Wait until the startup process to complete.


 Nu Html Checker
  na
na